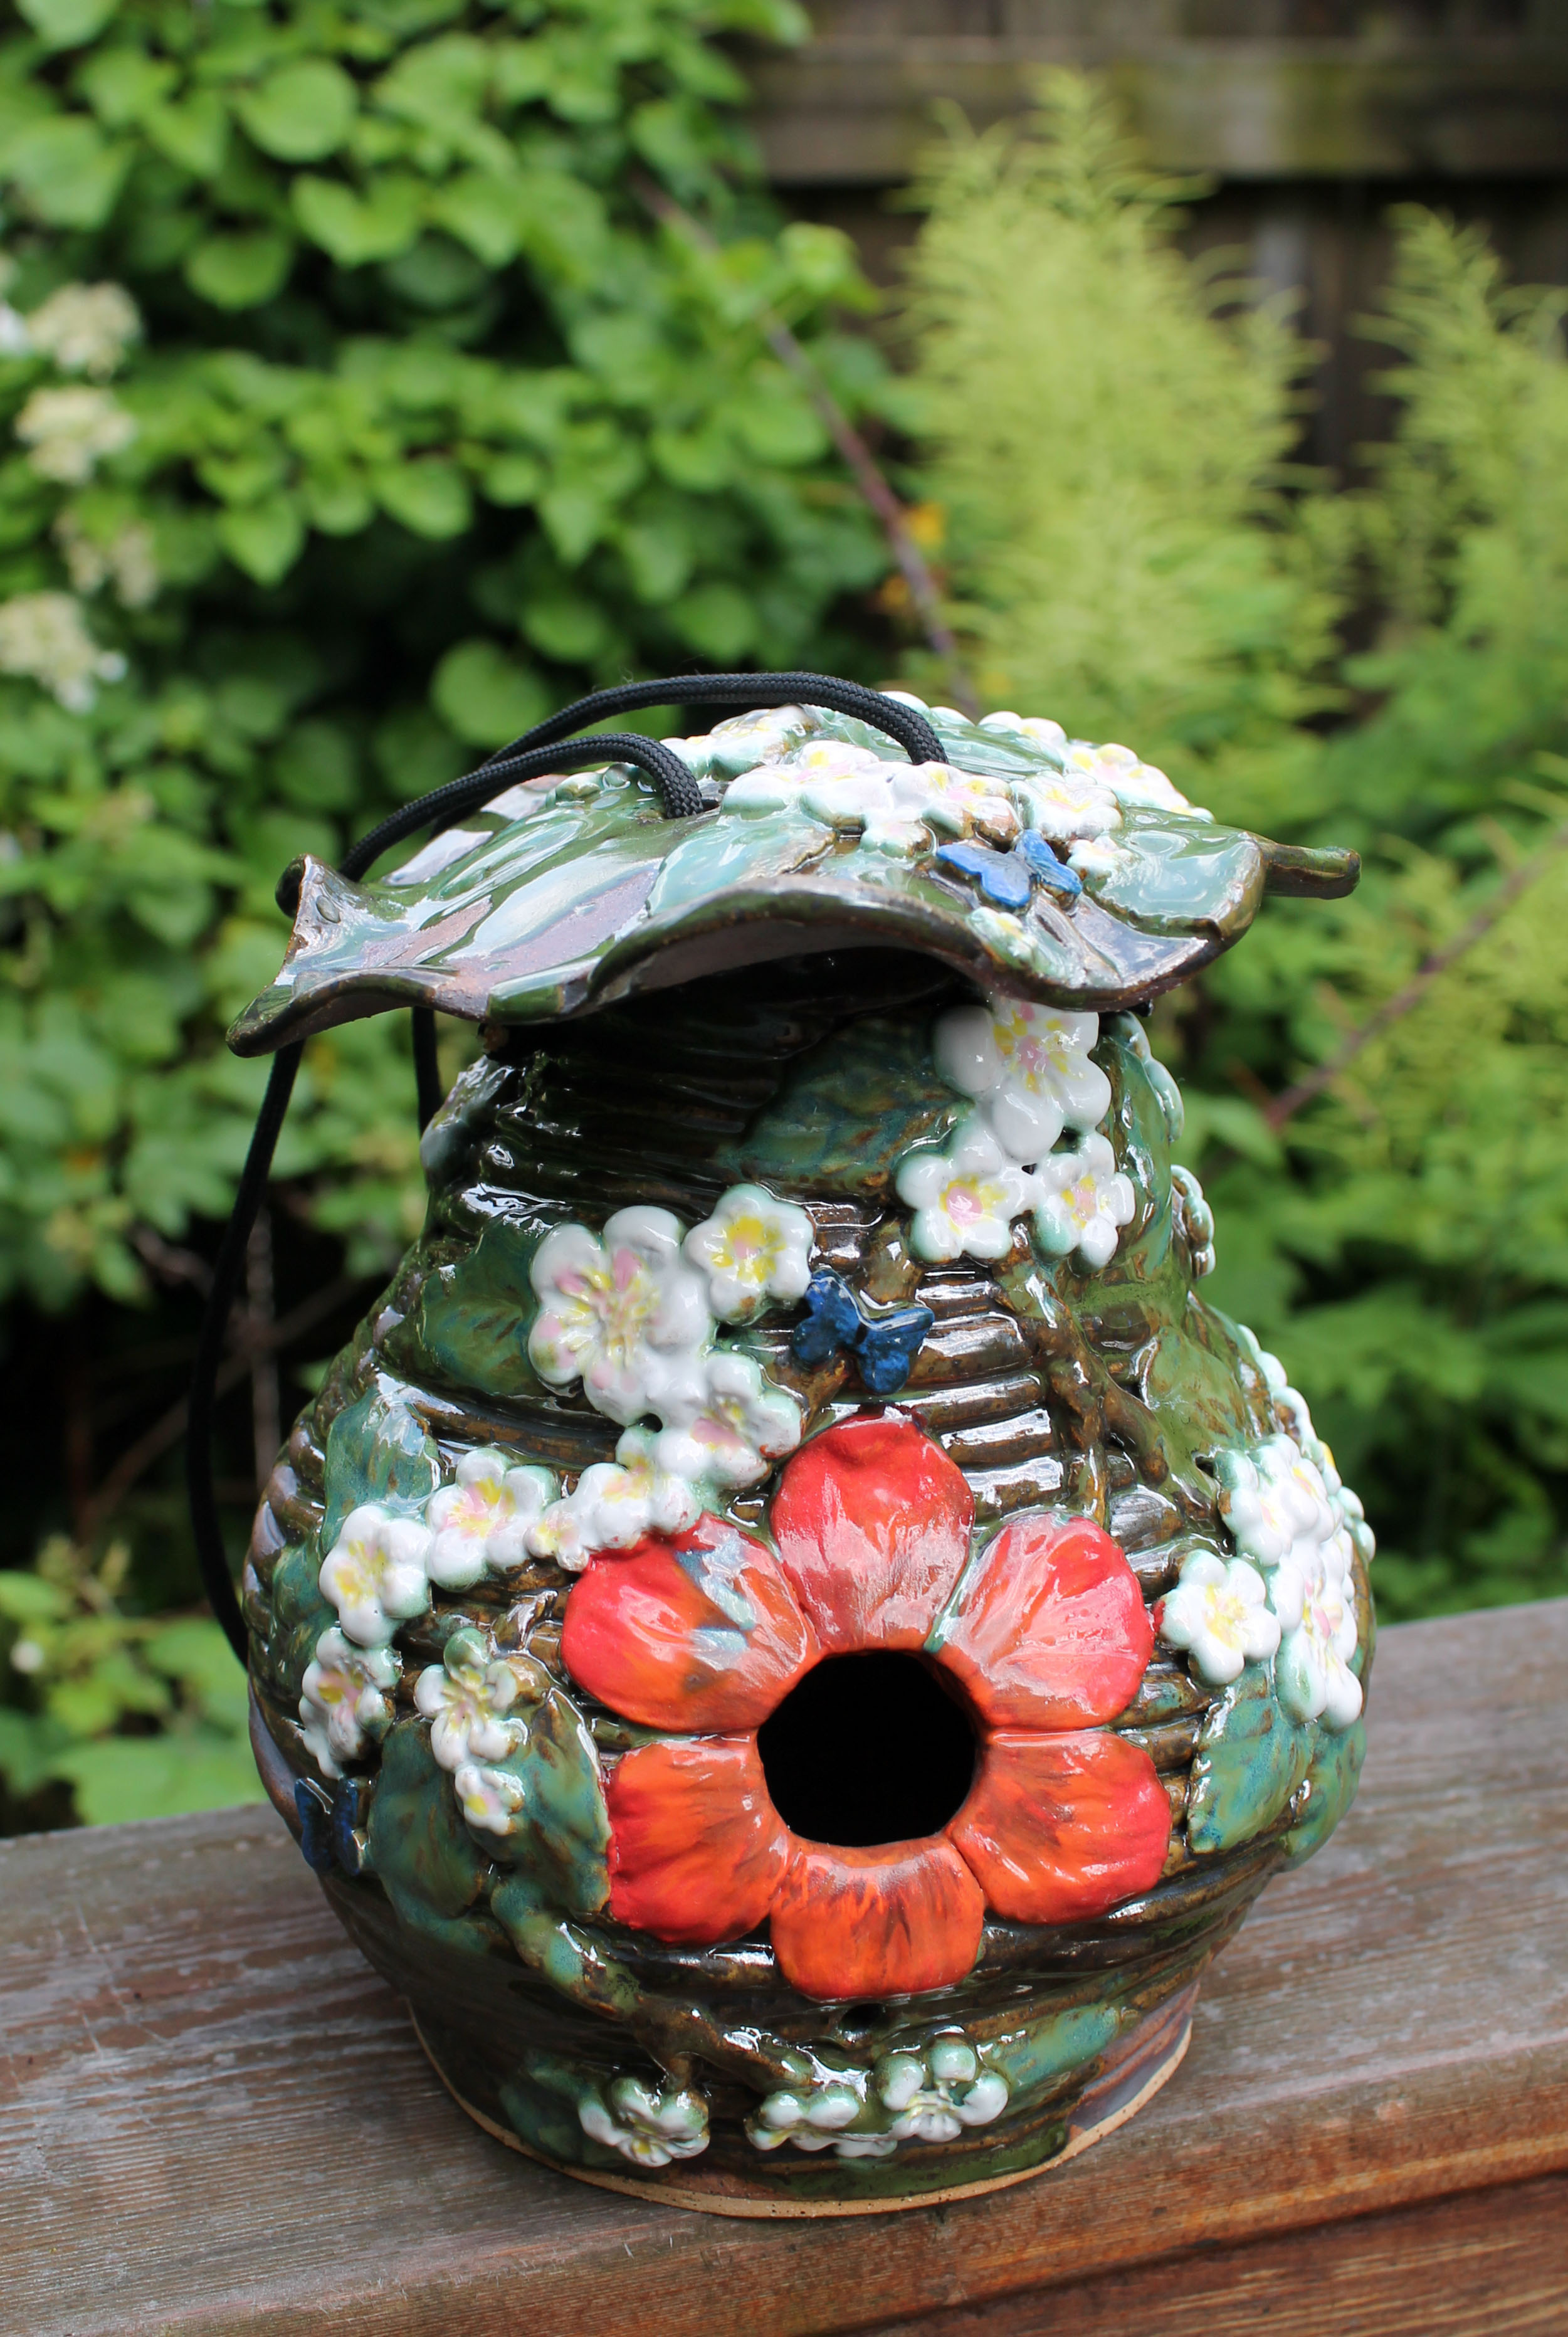
Well, spring is almost done and summer is almost here! I finally glazed up a birdhouse that has been bisque fired and waiting for glaze for almost a year! Sometimes I am just not brave enough. I love how it turned out! It was hand-built with coils in a style that reminds me of an old fashioned beehive. A jaunty looking lid covers the top opening. There is a drainage hole in the bottom. Trailing cherry blossoms and little blue butterflies wrap around. The red flower seems to sprout out from the 1 1/4″ hole in the middle giving the perfect size for a special backyard bird to make a home. It’s about 8″ tall and 7″ wide at the base.
Supply list and directions to make your own are below! If you are interested in purchasing this particular one, please go to my etsy shop, hydeparkhill.etsy.com where you can find this and many other lovely items to beautify your life!
Enjoy your cheery, cherry blossom spring morning!
Eileen
Supplies: Clay: speckled cone 5 clay for main body, b-mix 5 for flowers, leaves and butterflies, Other supplies: cherry blossom fondant mold, leaf shape cookie cutter, 5 petal flower cookie cutter, leaf or petal vein press mold (I used Wilton’s fondant flower molds & vein mold), parachute cord for hanging it up.
Glaze: Laguna White, Yellow, Clear Bright, Amaco Celebration Pink, Potter’s Choice Seaweed; Velvet Underglaze: electric blue, black, bright red, orange
Directions: Roll out a 1/4″ thick slab and cut your circle shaped base and cut an uneven wavy shape for the top- curve the sides with your fingers and use newsprint or paper towels to help the up and down curves to keep their shape, cut two holes for the cord about an inch or two apart. Set the top aside to be soft leather hard. Cut a hole in the bottom slab with a 1/4″ hole cutter for drainage, slip and score around the edge and roll out your first coil. Attach your coil and continue to roll and attach coils all the way up to the top- slowly bringing in shape to be more narrow at the top. Let it firm up a bit. Cut a hole 1 1/2″ in the middle of the side of your birdhouse. Cut two holes- one on each side at the top for the cord to be strung through and then through the lid- make sure everything lines up well. Roll a small slab and cut a 5 petal flower, cut the petals apart and give the petals veins with a texture tool or a leaf vein tool. Slip and score and attach your petals around the entrance hole. Using your flower mold and cornstarch, make flowers, branches and leaves attaching them wherever you want all the way around the birdhouse and on the lid. Slip and score and attach butterflies. Cover with plastic and let it sit for a few days. Slowly dry. Bisque fire to cone 05, glaze and fire to cone 5. I used black parachute cord for hanging it up!