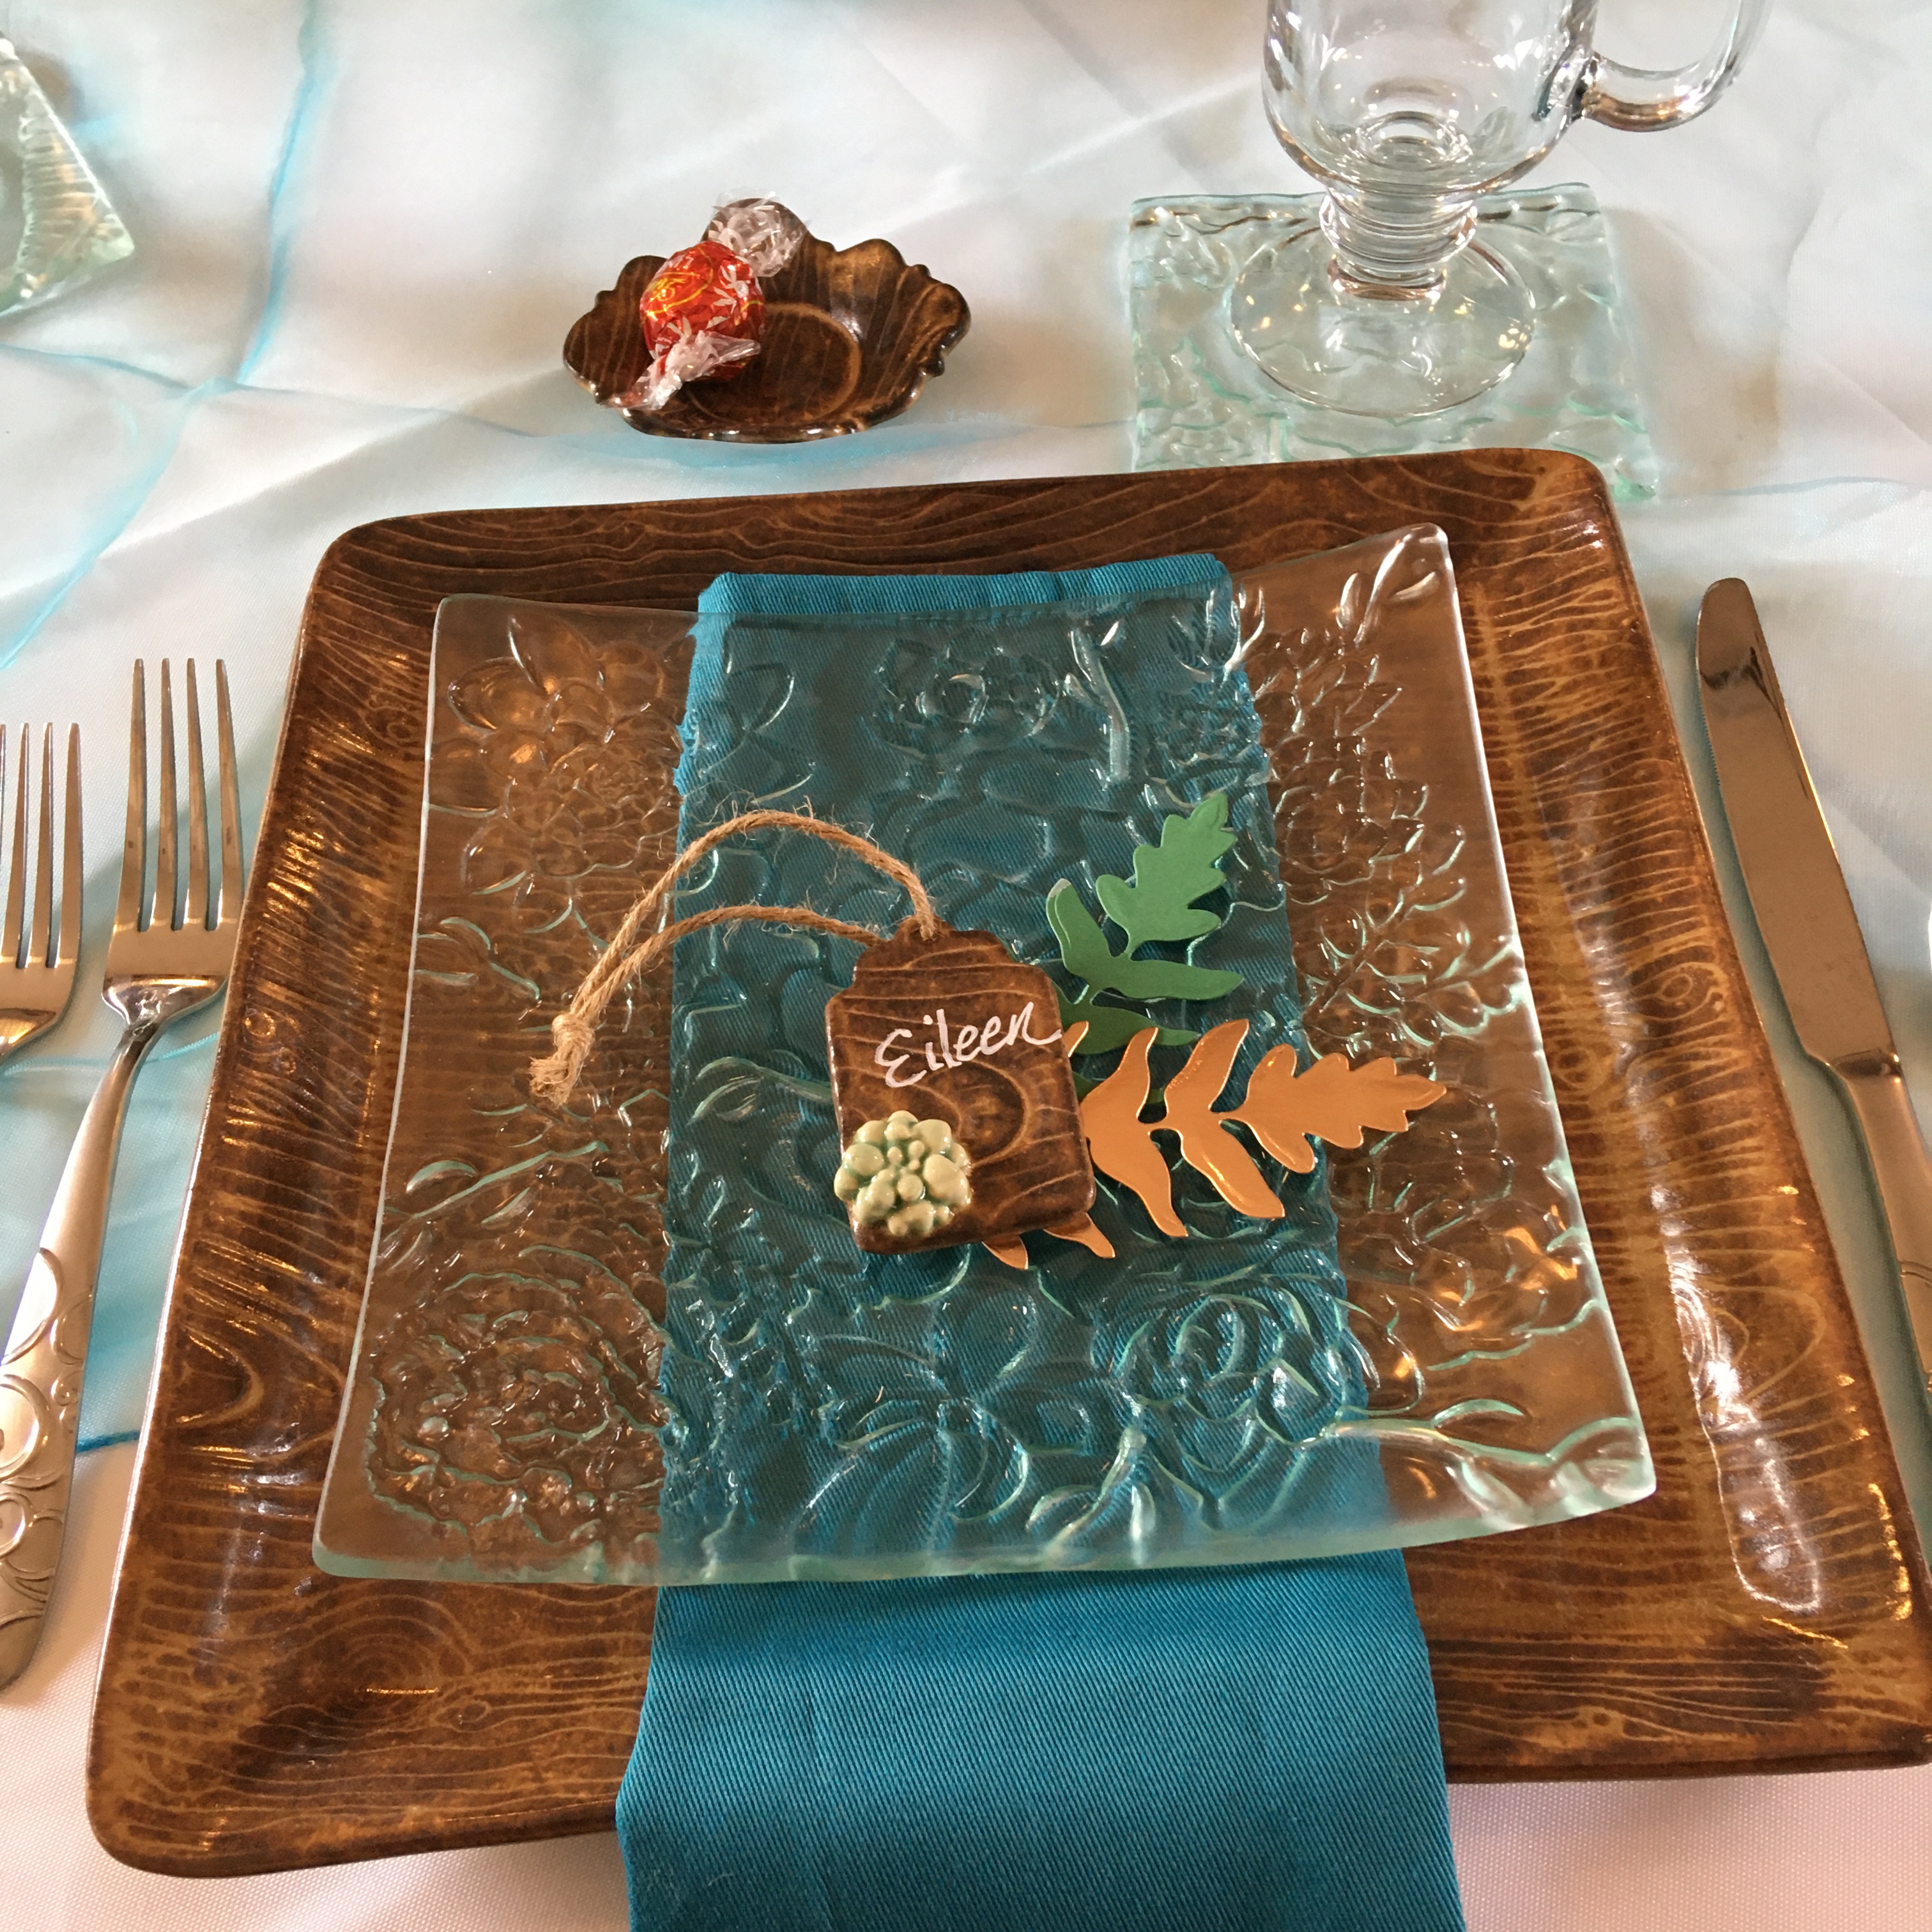
I’ve wanted to make a set of dishes for a long time. I finally did it! I hosted a table at a “Date Night” event. Hosting included making the menu and setting the table, contacting the other 3 couples at my table and request they bring items from the menu. Easy, peasy, right?!!! So, I set the table and make the main dish, everyone else brings the side dishes or dessert! Only, I had this “Amelia Bedelia” moment (a funny children’s book series where the main character, Amelia, takes everything her boss says literally) I thought, oh, I could “make the dishes” like all…make all the actual the plates we will put our food on. I will preference this by saying, some hosts were going to use paper plates for the event. I thought, oh, I will make this extra special, I will make the main dish AND the dishes we eat from. ahahahhahha!!! Three weeks of insanity of planning and making, and continual use my pottery and glass kilns and woo hooo done! I completed a beautiful set of dishes for 8 people. Did I mention and ordering a tablecloth, napkins and fake succulents from Amazon.com helped. ahahahahah!!! 🙂 oh and Lindt Chocolate Truffles. Please, is there anything more delicious and readily available? Especially for Valentine’s?
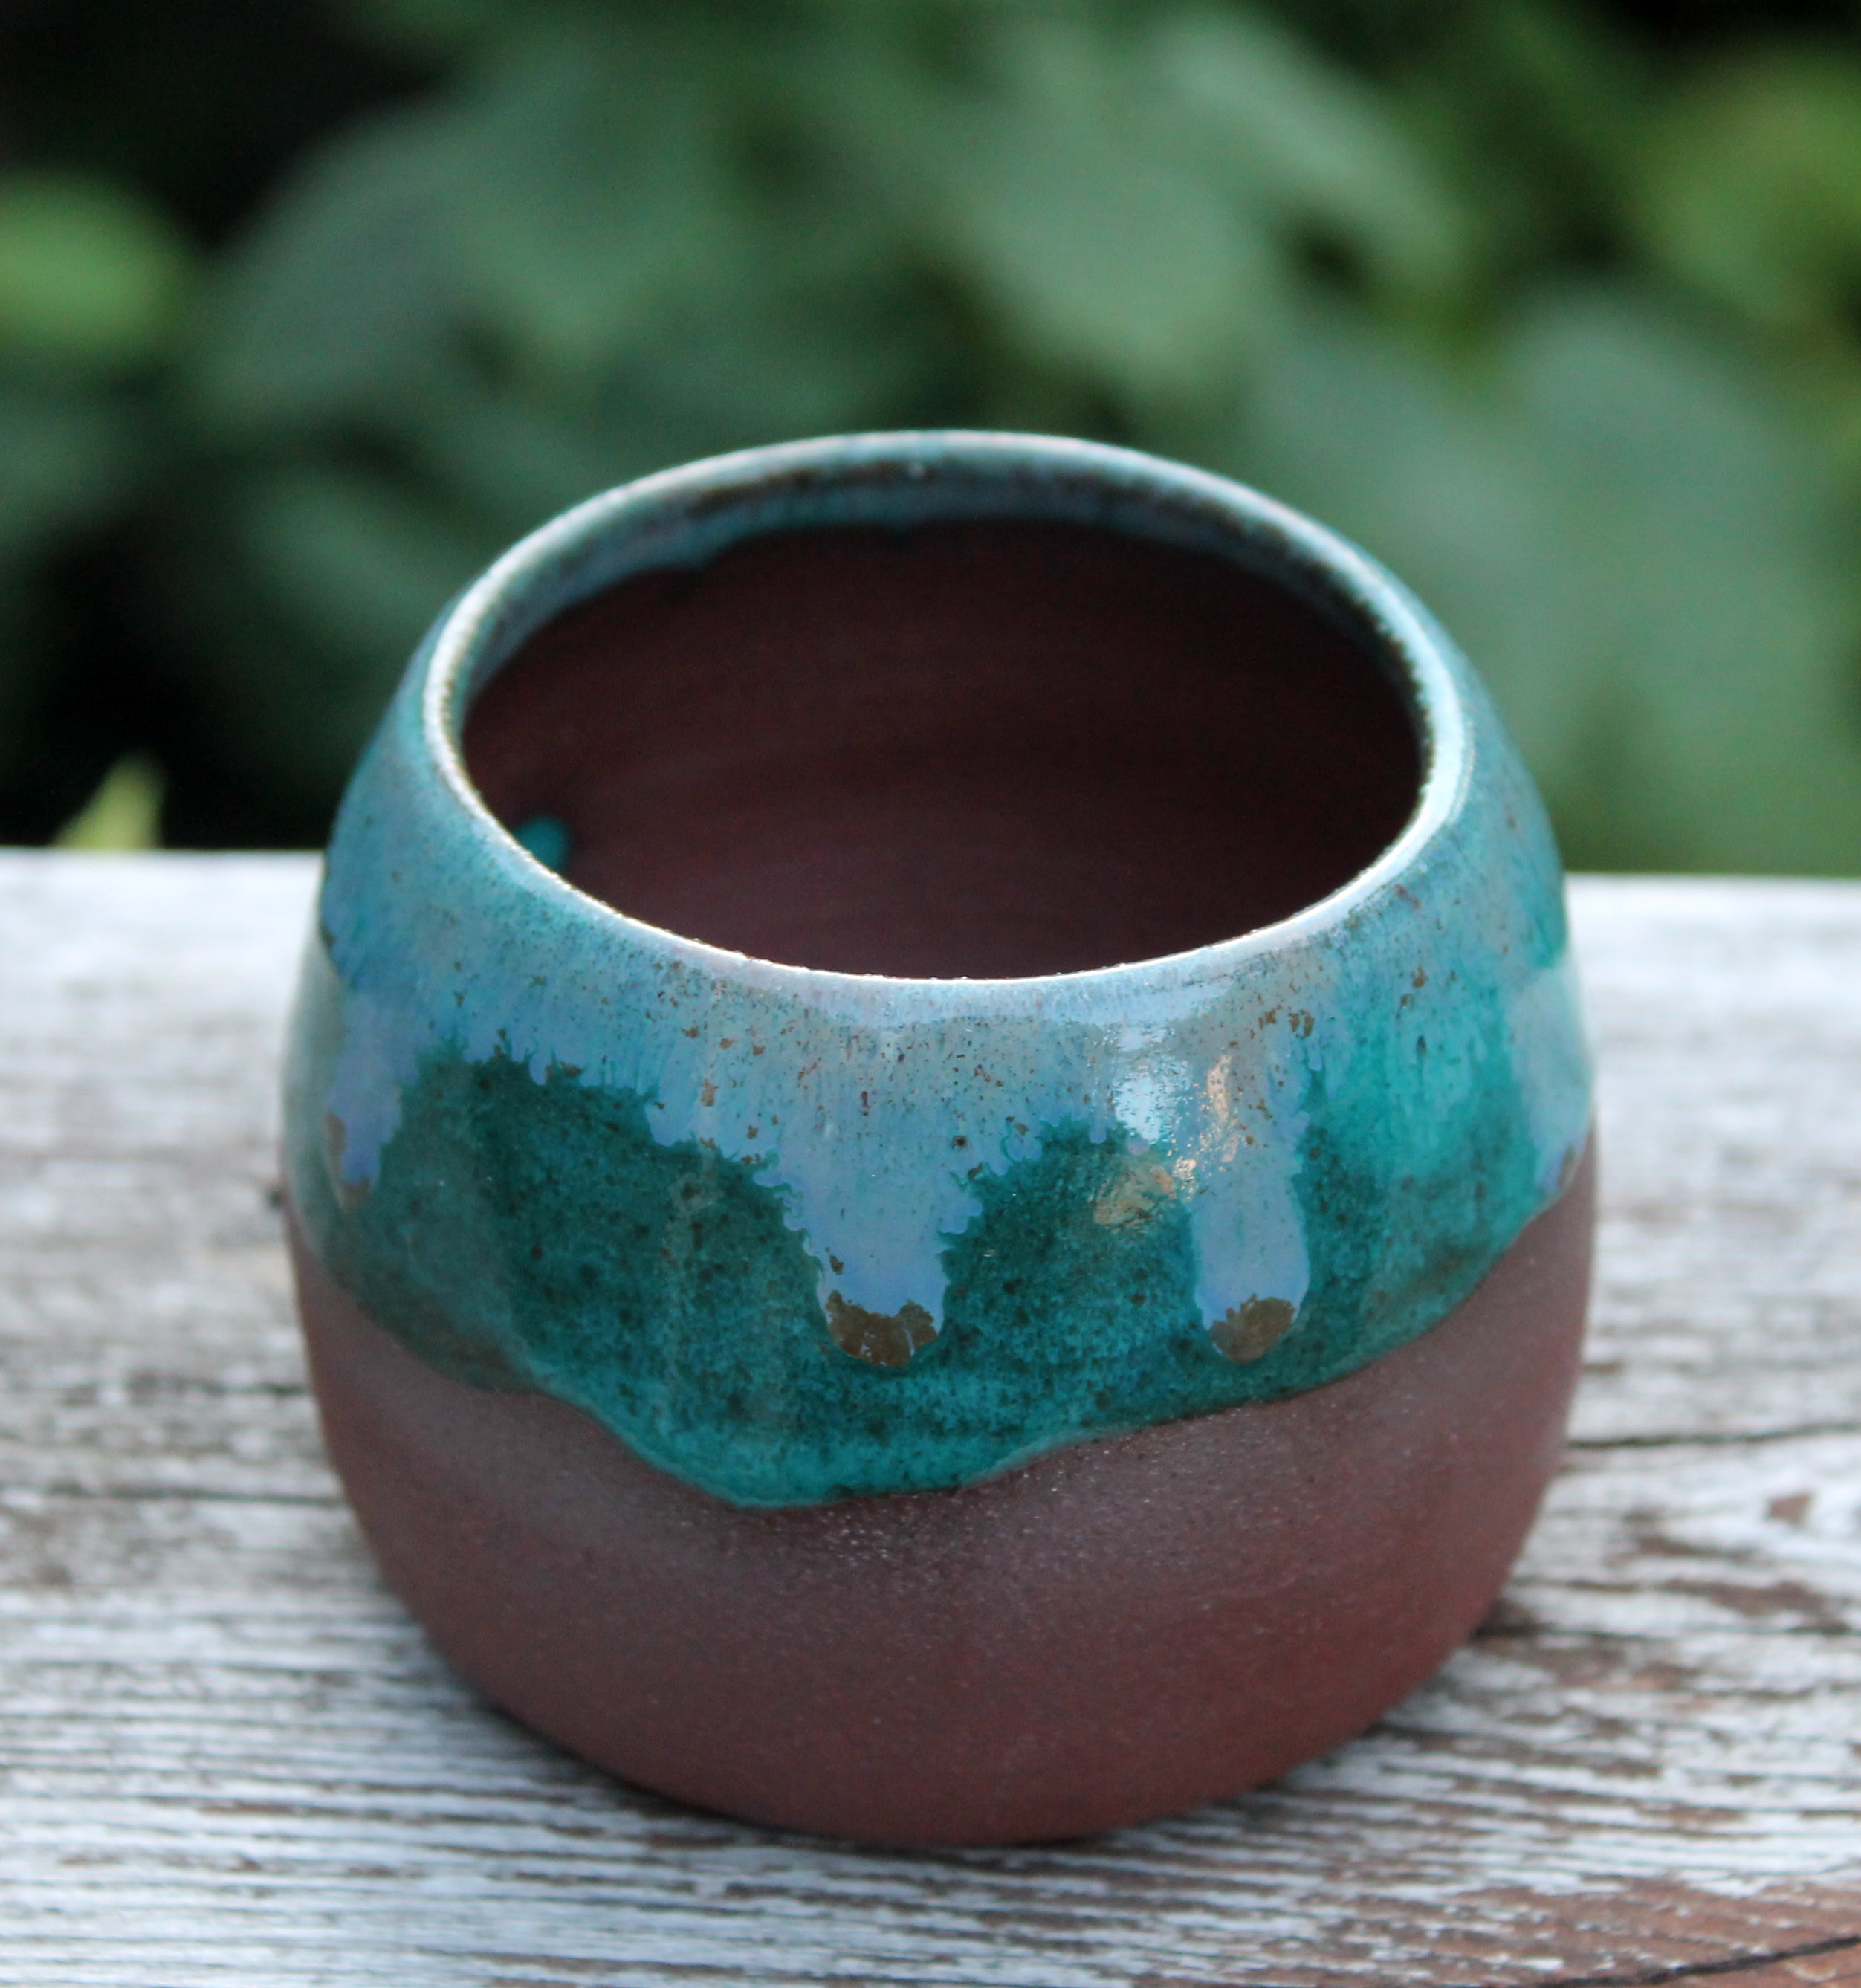
Here is what I did! I had a succulent texture tile and a fern texture tile from Creative Paradise Glass www.creativeparadiseglass.com and I was already making little succulent vases with my wild clay. I decided to making a theme of succulents and ferns and make dishes with glass and pottery. Using wood forms my husband made for me, I hand-built 9 12″ x 12″ wood grain texture hand-built plates. (always make an extra….) I used float glass from shelving I purchased from a department store that closed for the glassware. Wild clay from my property was used to make little vases. Yes, I used imitation succulents from Amazon, because it was winter. My die cut ferns were made with an older die cut from Spellbinders. The green and copper paper is from Recollections by Michaels.com. My color scheme as you can see was turquoise, wood, copper and white linens, turquoise napkins, turquoise organza overlay on a white tablecloth. The colors worked great because the chairs were a deep green.
Make every meal special! and invite friends to a pot luck date night dinner!
If you have any questions, please leave a comment! I will get back to you!
Next post—- my menu! It was delicious!
Happy Creating!
Eileen
![IMG_3956[1]](https://i0.wp.com/hydeparkhill.com/wp-content/uploads/2020/02/img_39561.jpg?resize=980%2C980&ssl=1)
![IMG_3954[1]](https://i0.wp.com/hydeparkhill.com/wp-content/uploads/2020/02/img_39541.jpg?resize=980%2C1307&ssl=1)
![IMG_3958[1]](https://i0.wp.com/hydeparkhill.com/wp-content/uploads/2020/02/img_39581.jpg?resize=980%2C980&ssl=1)
![IMG_3960[1]](https://i0.wp.com/hydeparkhill.com/wp-content/uploads/2020/02/img_39601.jpg?resize=980%2C980&ssl=1)


![IMG_2032[1]](https://i0.wp.com/hydeparkhill.com/wp-content/uploads/2019/07/img_20321.jpg?resize=980%2C735&ssl=1)
![IMG_2164[1]](https://i0.wp.com/hydeparkhill.com/wp-content/uploads/2019/07/img_21641.jpg?resize=960%2C720&ssl=1)
![IMG_2165[1]](https://i0.wp.com/hydeparkhill.com/wp-content/uploads/2019/07/img_21651.jpg?resize=960%2C720&ssl=1)
![IMG_2110[1]](https://i0.wp.com/hydeparkhill.com/wp-content/uploads/2019/07/img_21101.jpg?resize=980%2C735&ssl=1)
![DAFG8053[1]](https://i0.wp.com/hydeparkhill.com/wp-content/uploads/2019/07/dafg80531.jpg?resize=980%2C1307&ssl=1)
![IMG_2529[1]](https://i0.wp.com/hydeparkhill.com/wp-content/uploads/2019/08/img_25291.jpg?resize=980%2C980&ssl=1)