Posted on Leave a comment

Just Beeeecause honeybee card

justbecause bee card front viewHello Everyone!

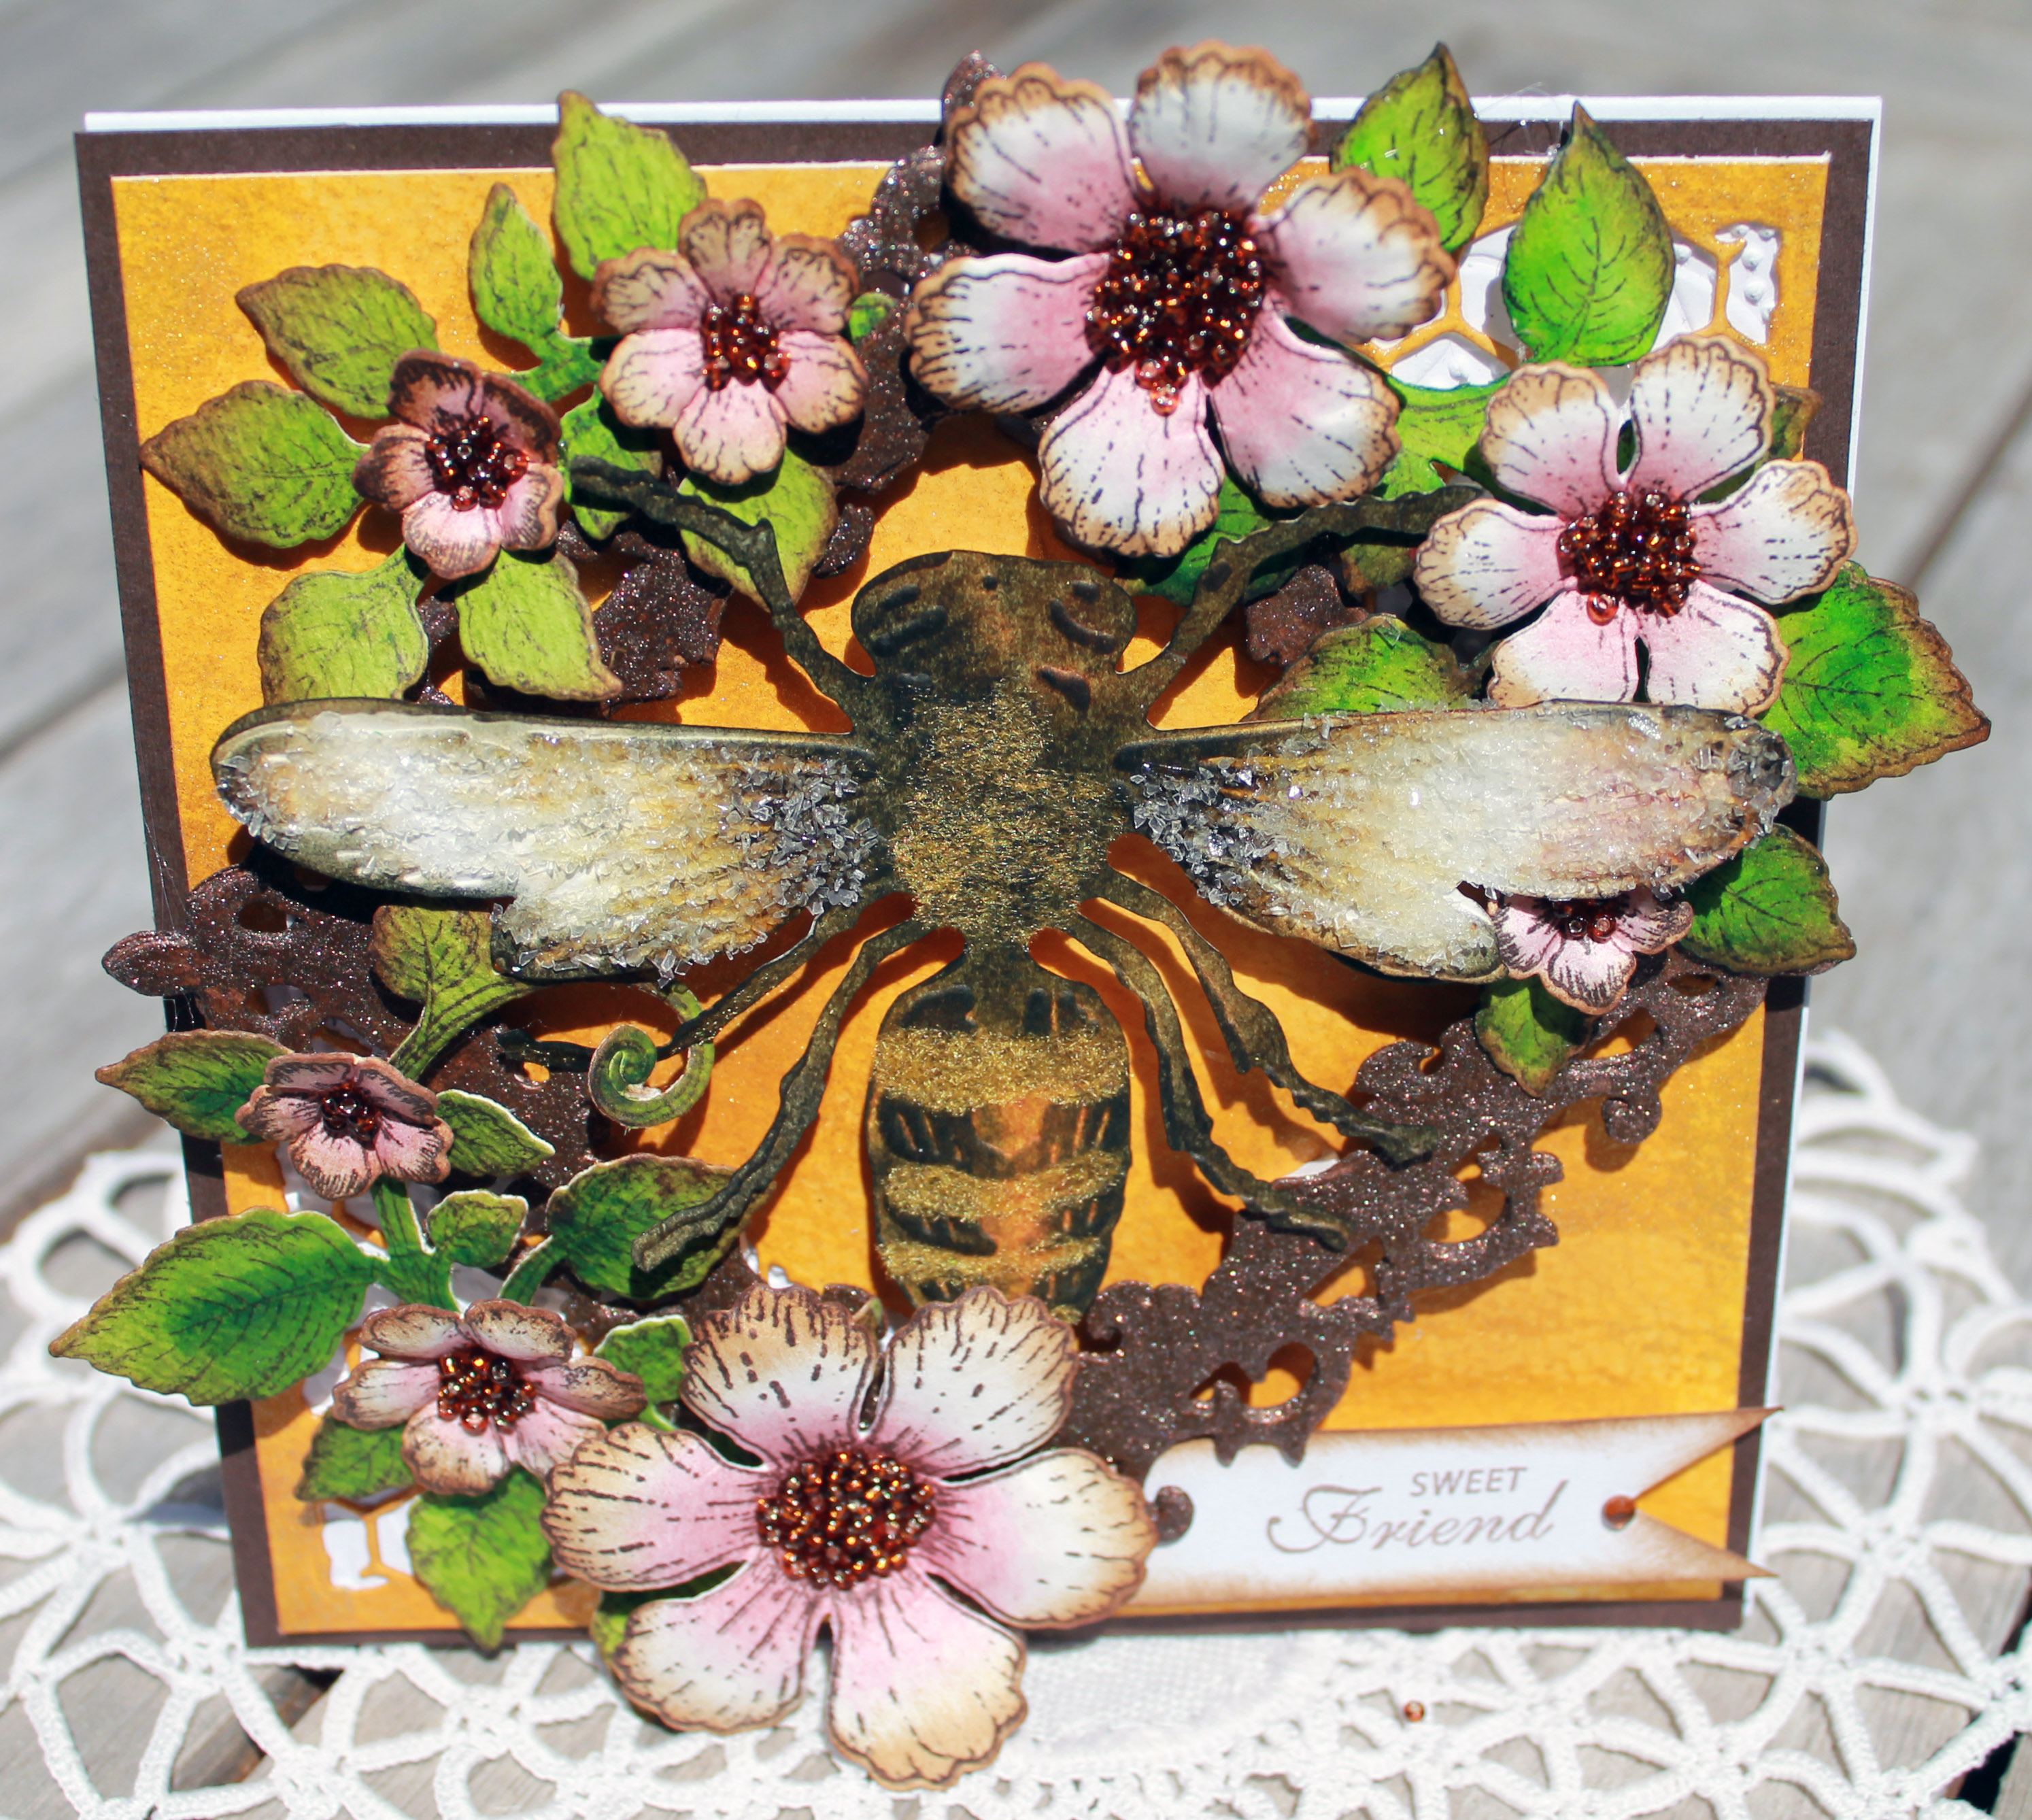
Here is a sweet card! Two versions of the same card— one that says “just because” and another that says “Sweet Friend”. Both card have the same features- a beautiful arrangement of flowers and a large honeybee.  The perfectly sweet way to say hello to your friend, near or far. Available in my Etsy shop, HydeParkHill. 🙂 enjoy !

Supplies: 6″ x 6″ white cardstock base, dark brown cardstock (for matting), 5.5 square of 140# cold press watercolor paper, Tim Holtz honey bee die and texture embossing folder, Honeycomb die from Tim holtz mixed media dies, Heartfelt Creations Bontanic Rose stamp and matching die, Heartfelt Creations classic leaves stamp and matching die, Heartfelt Creations Blossoms & Birds collection small flowers. Spellbinders frame, embellishments- seed beads, yellow flower soft, broken glass glitter, brown walnut stamp paint, Distress Ink: honey, Vintage Photo, Victorian velvet, mowed lawn, peeled paint, black soot, walnut stain, Staz-on Timber brown ink

Directions: Cut a 5.5″ x 5.5″ card base from white 110# cardstock, this will make a strong base for card.  Cut your dark brown cardstock for two matts 5.25″  x 5.25″, cut a white inside matt of 5″ x  5″. Cut a 5″ x 5″ piece of watercolor paper. Cut the honeycomb die from the top left and bottom right of the watercolor square. Color this piece with honey ink and edge with some vintage photo ink. Set aside to dry. Cut your bee and emboss with the texture matt. color the body with black soot and walnut stain ink. Color the wing edges with vintage photo and then lightly with some walnut stain. Put some “dries clear glue” on the body on the stripes and sprinkle with yellow flower soft. put glitter on the wings. Set aside to dry. Stamp your flowers on watercolor paper with Staz-on.timber brown ink  Color the middles of your flowers with Victorian velvet. Cut our your flowers and edge with vintage photo and shape. Stamp the largest classic leaves stamp with brown and color with mowed lawn and peeled paint, die cut and then edge the leaves with vintage photo. Cut two frames from Spellbinders, glue together or use a chipboard frame. Coat with brown stamp paint. Set aside to dry. Assemble your layers inside your card and outside on the front. Add dimensional foam to your frame and bee and attach. Hot glue your flowers to the leaves and fill with centers of flowers with seed beads. Add your sentiment! Done! Enjoy!

Happy Crafting!

Eileen


Posted on Leave a comment

Pottery Adventures

I decided to make a pond bathroom floor for my son’s new bathroom. What an adventure! Buying clay, getting lily pads from a pond, making molds, making tile, bisque firing, glazing, glaze firi…

Source: Pottery Adventures

Posted on Leave a comment

Happy Anniversary!

anniversary easel card front view


Hi Everyone!

Wow, time flies! I have been busy with my Farmers’ Market Booth ! Now, that is done, and my card shop is decimated, (which I think is a good thing!) it’s time to start creating some new, beautiful cards!

This wasn’t a difficult card to make, but it was difficult to decide HOW to decorate it!

Supplies: 5 x7 hinge card, Rose creations dies, spellbinder rose leaf die, Sue Wilson maiden fern die, Sizzix ornate distressed frame, chipboard (cereal box) rhinestone bling, watercolor paper- 140# cold press 2 pieces cut 5 x7, pearl shimmer paper- 2 pieces cut 5 x7 distressed edges, rose leaves, prima baroque stencil, heart stencil, embossing paste, anniversary stamp- I used a justrite stamp. Staz-on black ink, vellum, white seam binding ribbon, hot glue.

Directions: Make a 5 x7 hinge card, then fold top half in half to make the easel. Cut one more piece of cardstock 5 x 7 glue to folded portion and it will stand up to make the front of the card. Use the baroque stencil to stencil the 2 5 x7  panels of watercolor paper, set aside to dry. Cut your roses from watercolor paper, ink the middles with spun sugar, shape with a bone folder, assemble with hot glue. Cut your leaves ink with peeled paint. Stamp Happy Anniversary with Staz-on black ink, set aside to dry. Cut two frames from chipboard, glue together, cut one frame with silver cardstock and glue on top. brush with some white acrylic paint to dull the silver a bit. Assemble the card as shown in the pics. Insert a bow made from seam binding ribbon.

The pocket on the back of the card was made with a leftover rose and some paper. I stenciled the heart, cut the paper to fit the space and cut another one to make the pocket. Use a 1 inch hole punch to make a half circle punch for sliding the card in and out. Cut a piece of cardstock to fit inside, hole punch, put on some ribbon, glue a flower and some leaves. Insert into the pocket. Glue the pocket on the back of the card.  Enjoy!

Have a beautiful day!

Eileen

anniversary easel card sideviewanniversary easel card top side viewanniversary easel card close up roseanniversary card back pull out card for signing

Posted on Leave a comment

Happy Father’s Day!

father's day card 2016

With Father’s Day coming up I thought soon I thought I would post a card for the special occasion! It features a paper golf ball, wooden golf peg and brads that look like screws! How fun! I especially like the argyle die cut that I touched up with gold embossing powder.

Supplies: Dark Grey 5″ x 7″ card base, navy blue paper, green paper free-hand cut with a curve to resemble a golf hill, a small bit of orange scrap paper, toothpick, wooden golf peg, navy blue ribbon, brads, father’s day stamp, hot glue, gold embossing powder, heat tool, adhesive, two inch circle punch (Recollections), Swiss dot embossing folder (Spellbinders), argyle die cut (Tim Holtz), Memento London Fog ink, Blue Sapphire distress ink

Directions: Cut your card base, cut navy blue matt, die cut with argyle die then brush on versamark and heat emboss with gold, cut 2 inch circle from white cardstock, emboss with Swiss dots, turn over and highlight backside edges with Memento London Fog ink, you want your golf ball to have indents, not bumps. Cut the green and adhere to the blue, cut the ribbon to wrap to backside of blue/green matt, cut smaller piece of ribbon, use hot glue to attach the golf peg to the small piece of ribbon and tie in knot. hot glue it to the long piece across the bottom of the card. stamp message, cut, mount on navy blue, use brads on sides, hot glue to the ribbon. Glue on golf ball. Use a toothpick as the stick for the orange sign. Cut paper to resemble flag, write #1 on it, glue it to the toothpick and stick it in behind the green paper. mount your navy piece to your base and matt inside with white for writing a personal message. If my directions are confusing, just look at the picture! 🙂

Happy Father’s Day to all you amazing dads out there who work hard and take care of their families!

Enjoy!

Eileen


Posted on Leave a comment

Congratulations!

Good morning!

I have a simple, yet elegant red & white shimmery congratulations card to share with you today!

Red flower Congrats full front view

Supplies: Spellbinders Rose Creations, Impression Obsession floral heart, memory box foliage, Justrite Congratulations stamp, Memento Tuxedo black ink, 110# white cardstock for base, 140# cold press watercolor paper, vellum, red spray ink, perfect pearls pink spray ink, grape distress ink, stickles glitter (for center of rose), rhinestone bling

Directions: Make a 5″ x 7″ cardbase from white cardstock, cut a second piece of cardstock 4.5″ x 6.5″ and distress the edges. (I used my Zutter Distress it all tool.  Cut all your Rose pieces- cut two of the smallest and next smallest for a full middle. Lay your heart die  on the upper portion of your smaller piece of distress cardstock, die cut. Ink your heart and roses petals with red spray ink, pink perfect pearls ink, and when dry, edge the rose with distress ink grape. Shape your flowers using a stylus or a bone folder. I used a bone folder. Adhere layers together, I use hot glue so it goes fast and stays in place. Put some stickles in the center of your rose. Cut foliage from vellum. Do a dry run with your placement- so you have everything where you want it before you glue it down. Use pop dots to raise up distressed panel. Use wet glue or spray adhesive for the heart. Put hot glue at the bottom corner of the heart, lay your vellum leaves in place and put your flower on. Stamp your sentiment, add some rhinestones for bling! Done! 🙂 Simple. Elegant.

Enjoy your day!

Eileen

congrats red flower close up flowerred flwoer red heart congrats card close up


Posted on 3 Comments

80th Birthday!

Hi Everyone,

It was my mom’s 80th birthday this past weekend! I wanted to make a beautiful easel card for her. I haven’t made many of these types of cards, so deciding the shape was a bit time consuming! So many options!! Here it is!!

Supply list: Spellbinders grand labels 4, 110 # white cardstock for base and fold parts to make it sturdy. Candlelight/pearl cardstock layer, vellum layer with Swiss dot embossing, tulle layer, Lemon Craft -House of Roses paper for final top layer with matching rose embroidered ribbon, Tim Holtz frame- 2 pieces of chipboard (cereal box) with a layer of white cardstock, 140# cold press watercolor paper, Spellbinders (SB) rose creations die, SB rose leaf die, Sizzix number strip, Cheery Lynn fish banner, Recollections pearl bling. Distress Ink: Peeled Paint, vintage photo, picked Raspberry, spun sugar, antique linen. Staz-on ink: Jet Black. Dries clear adhesive, hot glue. Imagination. 🙂

Directions: Cut all your layers- two of each with whatever base shape and paper you decide. I have four layers. Make a hinged base layer, score the top layer of the base and fold in half. Cut all your roses from watercolor paper, spray lightly with water and ink with distress inks using a foam pad. Using a water brush and peeled paint and vintage photo, ink all your leaves. Let all your pieces dry. Cut your frame pieces and assemble, darken the edges with vintage photo ink. Cut two sets of numbers and layer them (bottom layer plain cardstock, top layer candlelight pearl cardstock) put foam dots on back to give height. Attach to card. Stamp sentiment on vellum, dry with heat tool. Cut with fish banner die from Cheery Lynn and attach. Shape and assemble roses with hot glue. Arrange leaves and flowers, then adhere with hot glue. Attach pearl bling. Cut one more piece and attach to back of card to write a special note and you are done! 🙂

I am entering this card in “Happy Birthday” Dies R Us Challenge  http://diesruschallenge.blogspot.com/?mc_cid=f82eef303c&mc_eid=e69a1bb331

Enjoy your week!

Eileen

IMG_6132

IMG_6130IMG_6129

Posted on Leave a comment

DINO myte! Kid’s Birthday

Good morning!

I don’t make many kids cards! But here is a fun step I made for the birthday of a young boy.

Enjoy the fun color combo of lime green bright orange and grey. I love how the fun dinosaurs are interacting by smiling at each other!

The step card is one of my favorite dies from Cheery Lynn, it makes this kind of card super easy to start. No measuring and scoring, just use the die and it does it for you! The grass is also a Cheery Lynn die. The dinosaurs are a digital cut file. The tropical leaves are from Joy! Crafts. I love the size and shape of the leaves. I used dimensional foam to pop everything up. White gel pen and black pen for the eyes. The Happy Birthday To You is from Spellbinders.

Have a beautifully creative day!

Eileen

Dino card frontDino card side viewDino card insideDino card backside

Posted on Leave a comment

Wedding Gatefold Card

Hi Everyone! Summer wedding season is just around the corner! Here is a gatefold wedding card to celebrate the special once in a lifetime (hopefully) occasion! The supply list and directions are at the end of this post.

Wedding Black and White Gatefold smaller file.jpg

Wedding Black and White Gatefold OpenWedding Black and White Gatefold with band wrapWedding Black and White Gatefold BacksideSupplies: White cardstock, black cardstock, vellum, Justrite wedding stamp, Sue Wilson dies-Gemini Pavo, Cheery Lynn dies- wedding silhouette, leaves, Spellbinders dies- Victorian accents, Spellbinders lables 34 embossing folder, Rose Creations, Memory Box butterfly die, Magnolia dies rose leaves, edge punch, adhesive, bling – rhinestones, pearl and tulle bling, tulle (for the veil). Adhesive, mounting foam, hot glue

Directions: Your finished card will be 5 1/2″ x 7 1/2″.  Cut white cardstock 11″ x 7 3/4″ score at 2 3/4″ and 9 1/4″  fold the sides into the middle. Put the Pavo die on the 2 1/4″ section and die cut. Repeat for other fold. Cut matching black sections. Emboss white cardstock with folder. Die cut Cheery Lynn wedding silhouette, mount to vellum. Using mounting adhesive, mount the wedding silhouette in the middle. Decorate with flowers and ribbons, tulle, and rhinestone bling. Die cut white side pieces with Pavo die, adhere.  Cut a black matt for the backside 5 1/4″ x 7 1/4″ mount. Cut a white matt 5″  x7″ mount on top of black matt. This will create a lovely space for writing a special note. For the bellyband, cut a strip of white paper 11″ long and 1 1/2″ wide, wrap around- it will be about 2″ too short- cut a 4″ black piece and use a fancy border edge punch and trim both ends adhere to the white piece. Decorate the front with die cuts, vellum leaves, tulle and pearl floral pics, stamp your sentiment, layer your pieces and adhere. Put your belly band around your card and you are finished! 🙂

Here’s to beautiful weddings this summer!

Eileen


Posted on Leave a comment

Sympathy

Hi Everyone,

Today I have a sympathy card. Not a cheery occasion, but if you need one, you want it to be beautiful and reflect your concern and thoughtfulness. I believe I have captured that with this cream sympathy card. With heavy weight cream cardstock, vellum and beautiful die cuts you can achieve this look too!

Supplies: cream cardstock or ivory, vellum, Heartfelt Creations Botanical Rose stamp and die, Memory Box butterfly,  Magnolia leaves, Marianne flourish die, Cheery Lynn flourish, lace, recollections pearl bling, antique embossing powder, versamark embossing stamp pad, Marianne swirl flourish stamp, adhesive

Directions: Cut a 5 1/2″ x 5 1/2″ card base from cream or ivory cardstock, cut one piece of vellum 5 1/4″ square, cut on piece of cream or ivory square 5″ x 5″. Take the ivory square and put the Marianne flourish on die cut and emboss. Line up your vellum and die cut piece and stamp your sentiment. Layer on lace and ribbon, adhere both pieces to the card base. Stamp, heat emboss and die cut the rose. Shape and layer, add the leaves and Cheery Lynn flourishes. Adhere to the card. Cut one butterfly from cardstock and another from vellum, layer, add a pearl and adhere. Stamp the inside with Versamark and heat emboss with the antique cream/gold powder. Write your sentiment inside and give.

Sincerely,

Eileen

cream sympathycream sympathy flower close upcream sympathy butterly and stamp close upcream sympathy inside embossing


Posted on 4 Comments

Happy Easter!

butterfly cross boxbutterfly corss box open
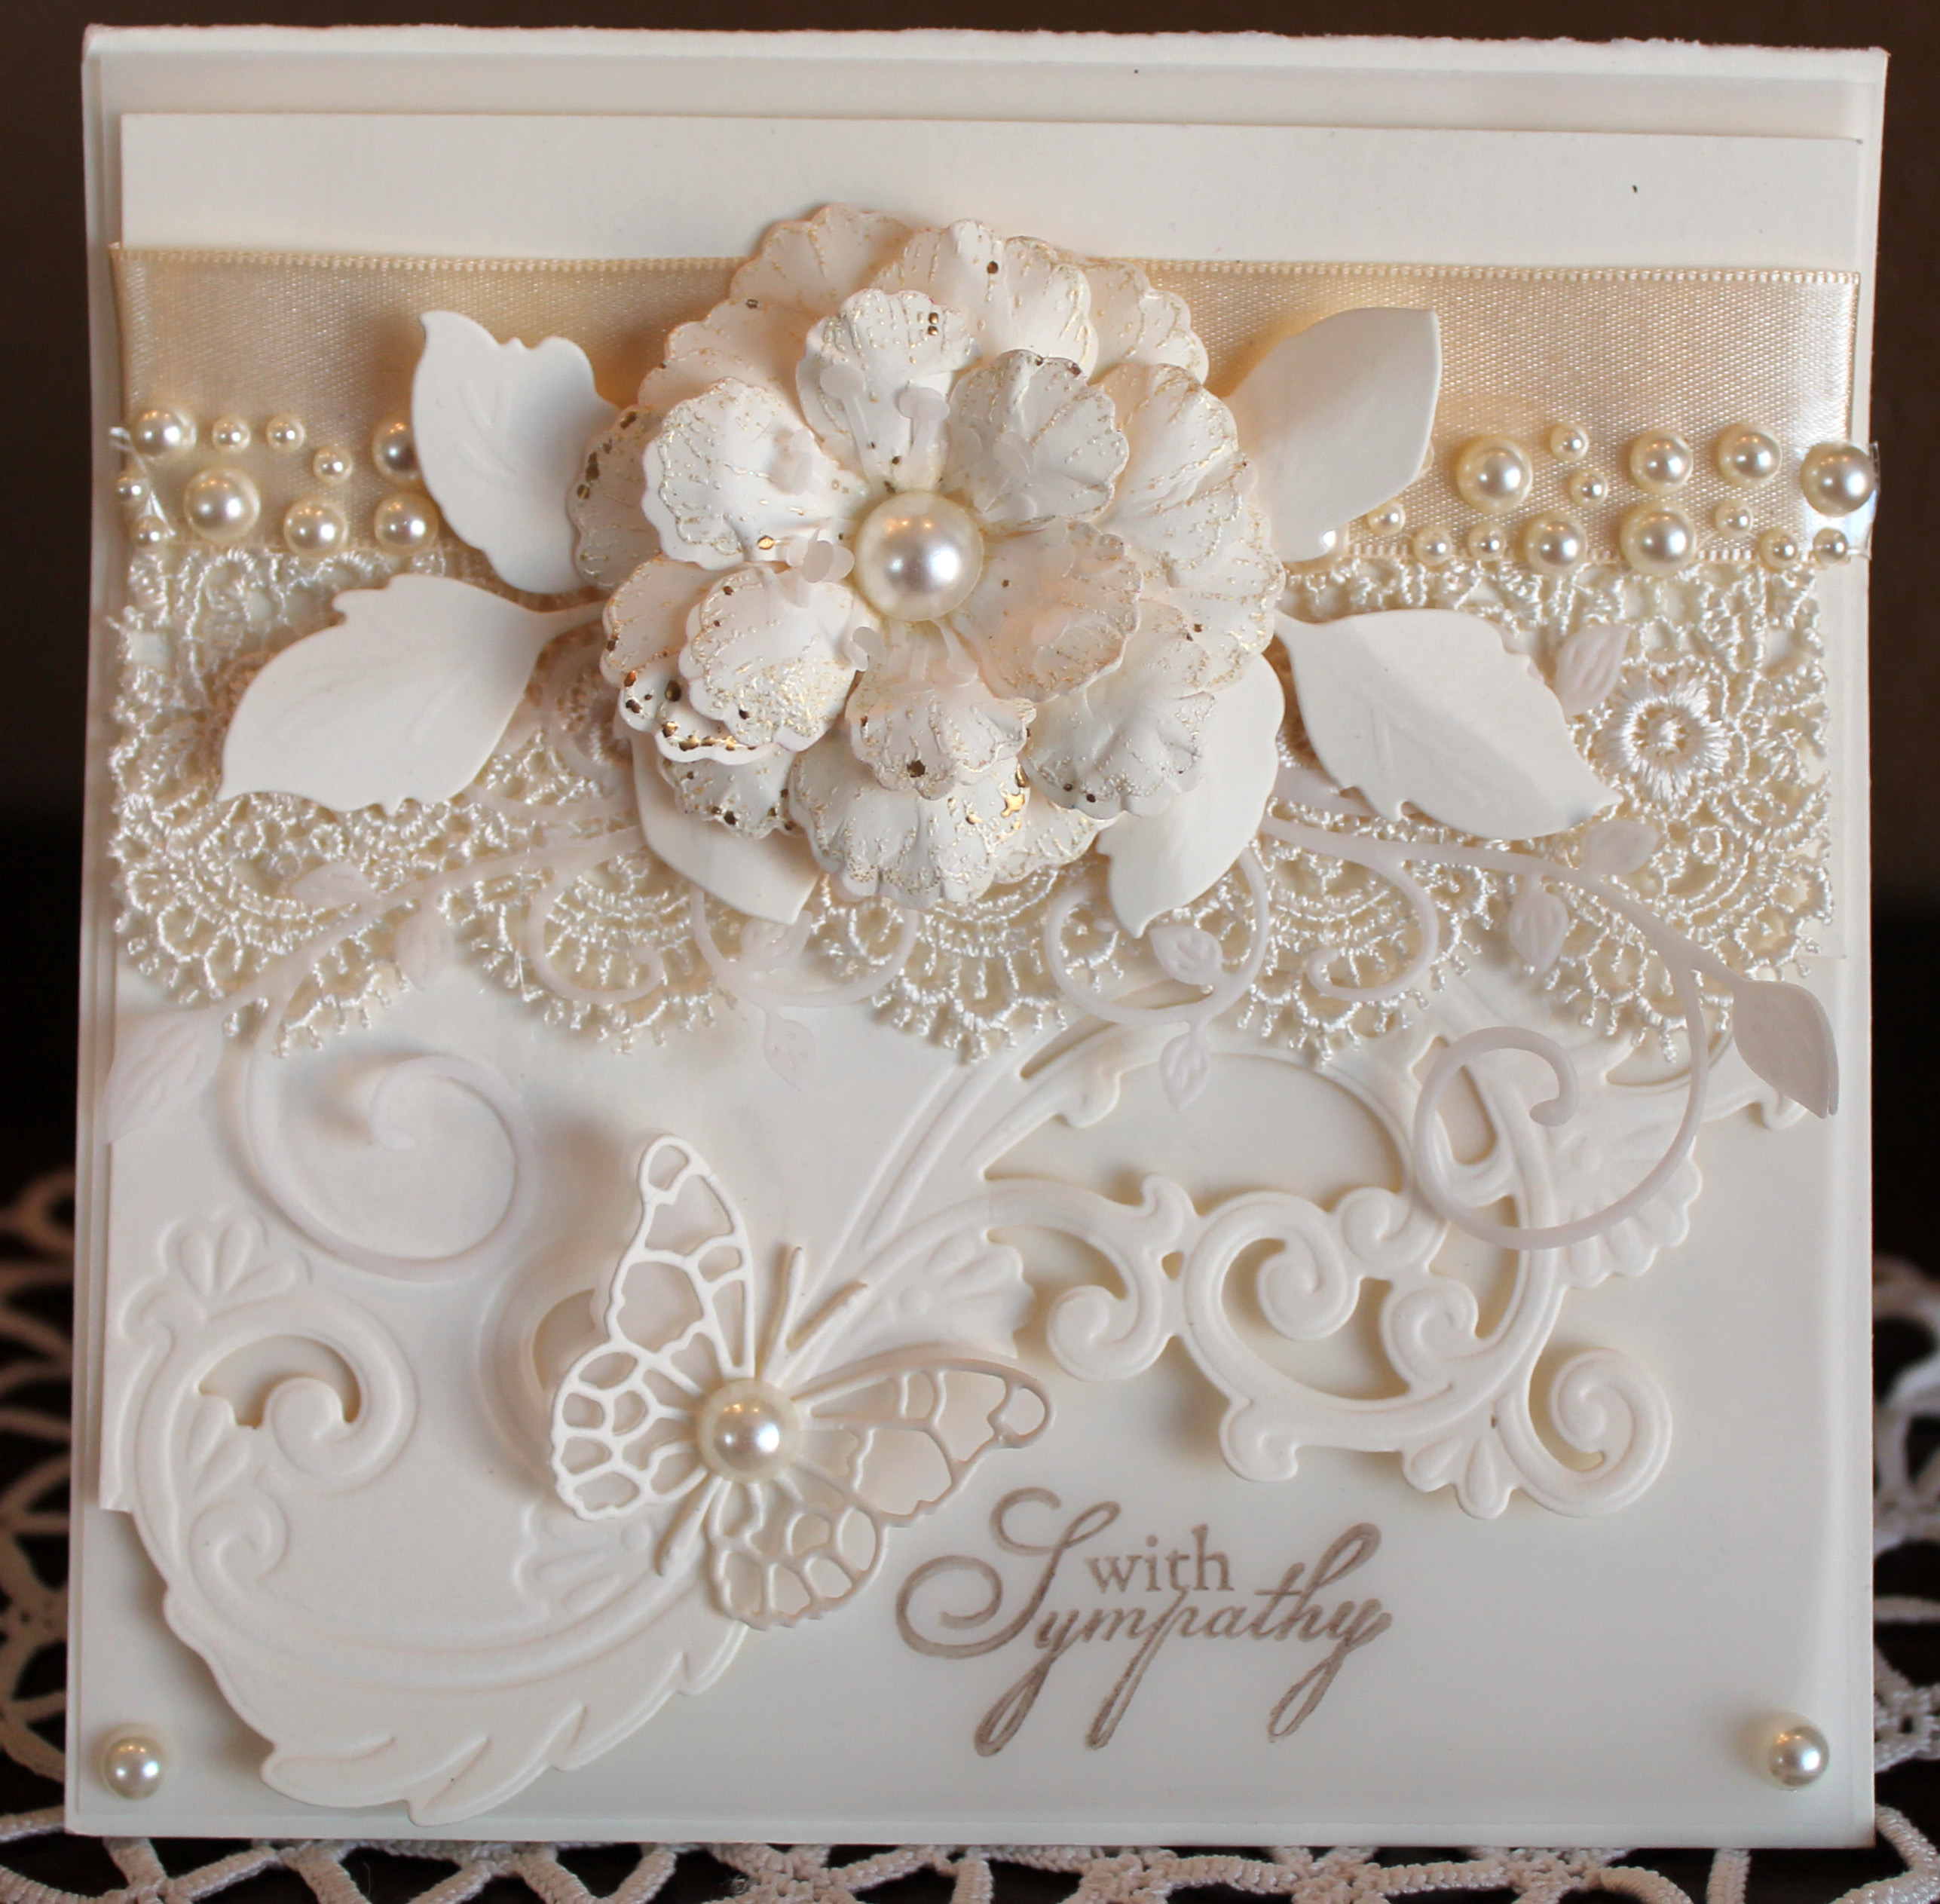
Happy Easter Everyone!

Today I have a special gift to show you! A butterfly Easter Cross Box! Perfect for gift giving this season!

Supplies: Silhouette cross box digital cut file, 2 pieces of purple 12 x 12 cardstock, silver poster cardstock, raspberry glitter paper, pearl shimmer cardstock, Cheery Lynn Flourishes, memory box tiny butterflies, Spellbinders large butterfly, Cheery Lynn Fishtail banner, He is Risen stamp

Directions: Cut one box bottom and one top, assemble, cut 4 flourishes- 2 large from pearl cardstock and 2 small from silver cardstock, attach with wet glue, cut two small butterflies from pearl cardstock assemble and attach, stamp your sentiment and cut out with fishtail banner, cut 1 large butterfly from pearl cardstock and the inset one from glitter paper, assemble and glue. Add bling and put the lid on! Done! Fill with a treat and give to a friend!

I am entering this into the Cheery Lynn design challenge: http://cheerylynndesigns.blogspot.com/2016/03/cheery-lynn-designs-challenge-225.html

butterfly cross box glitter butterfly close up