Posted on 1 Comment

Fairy Tale Wedding

Good morning Monday!

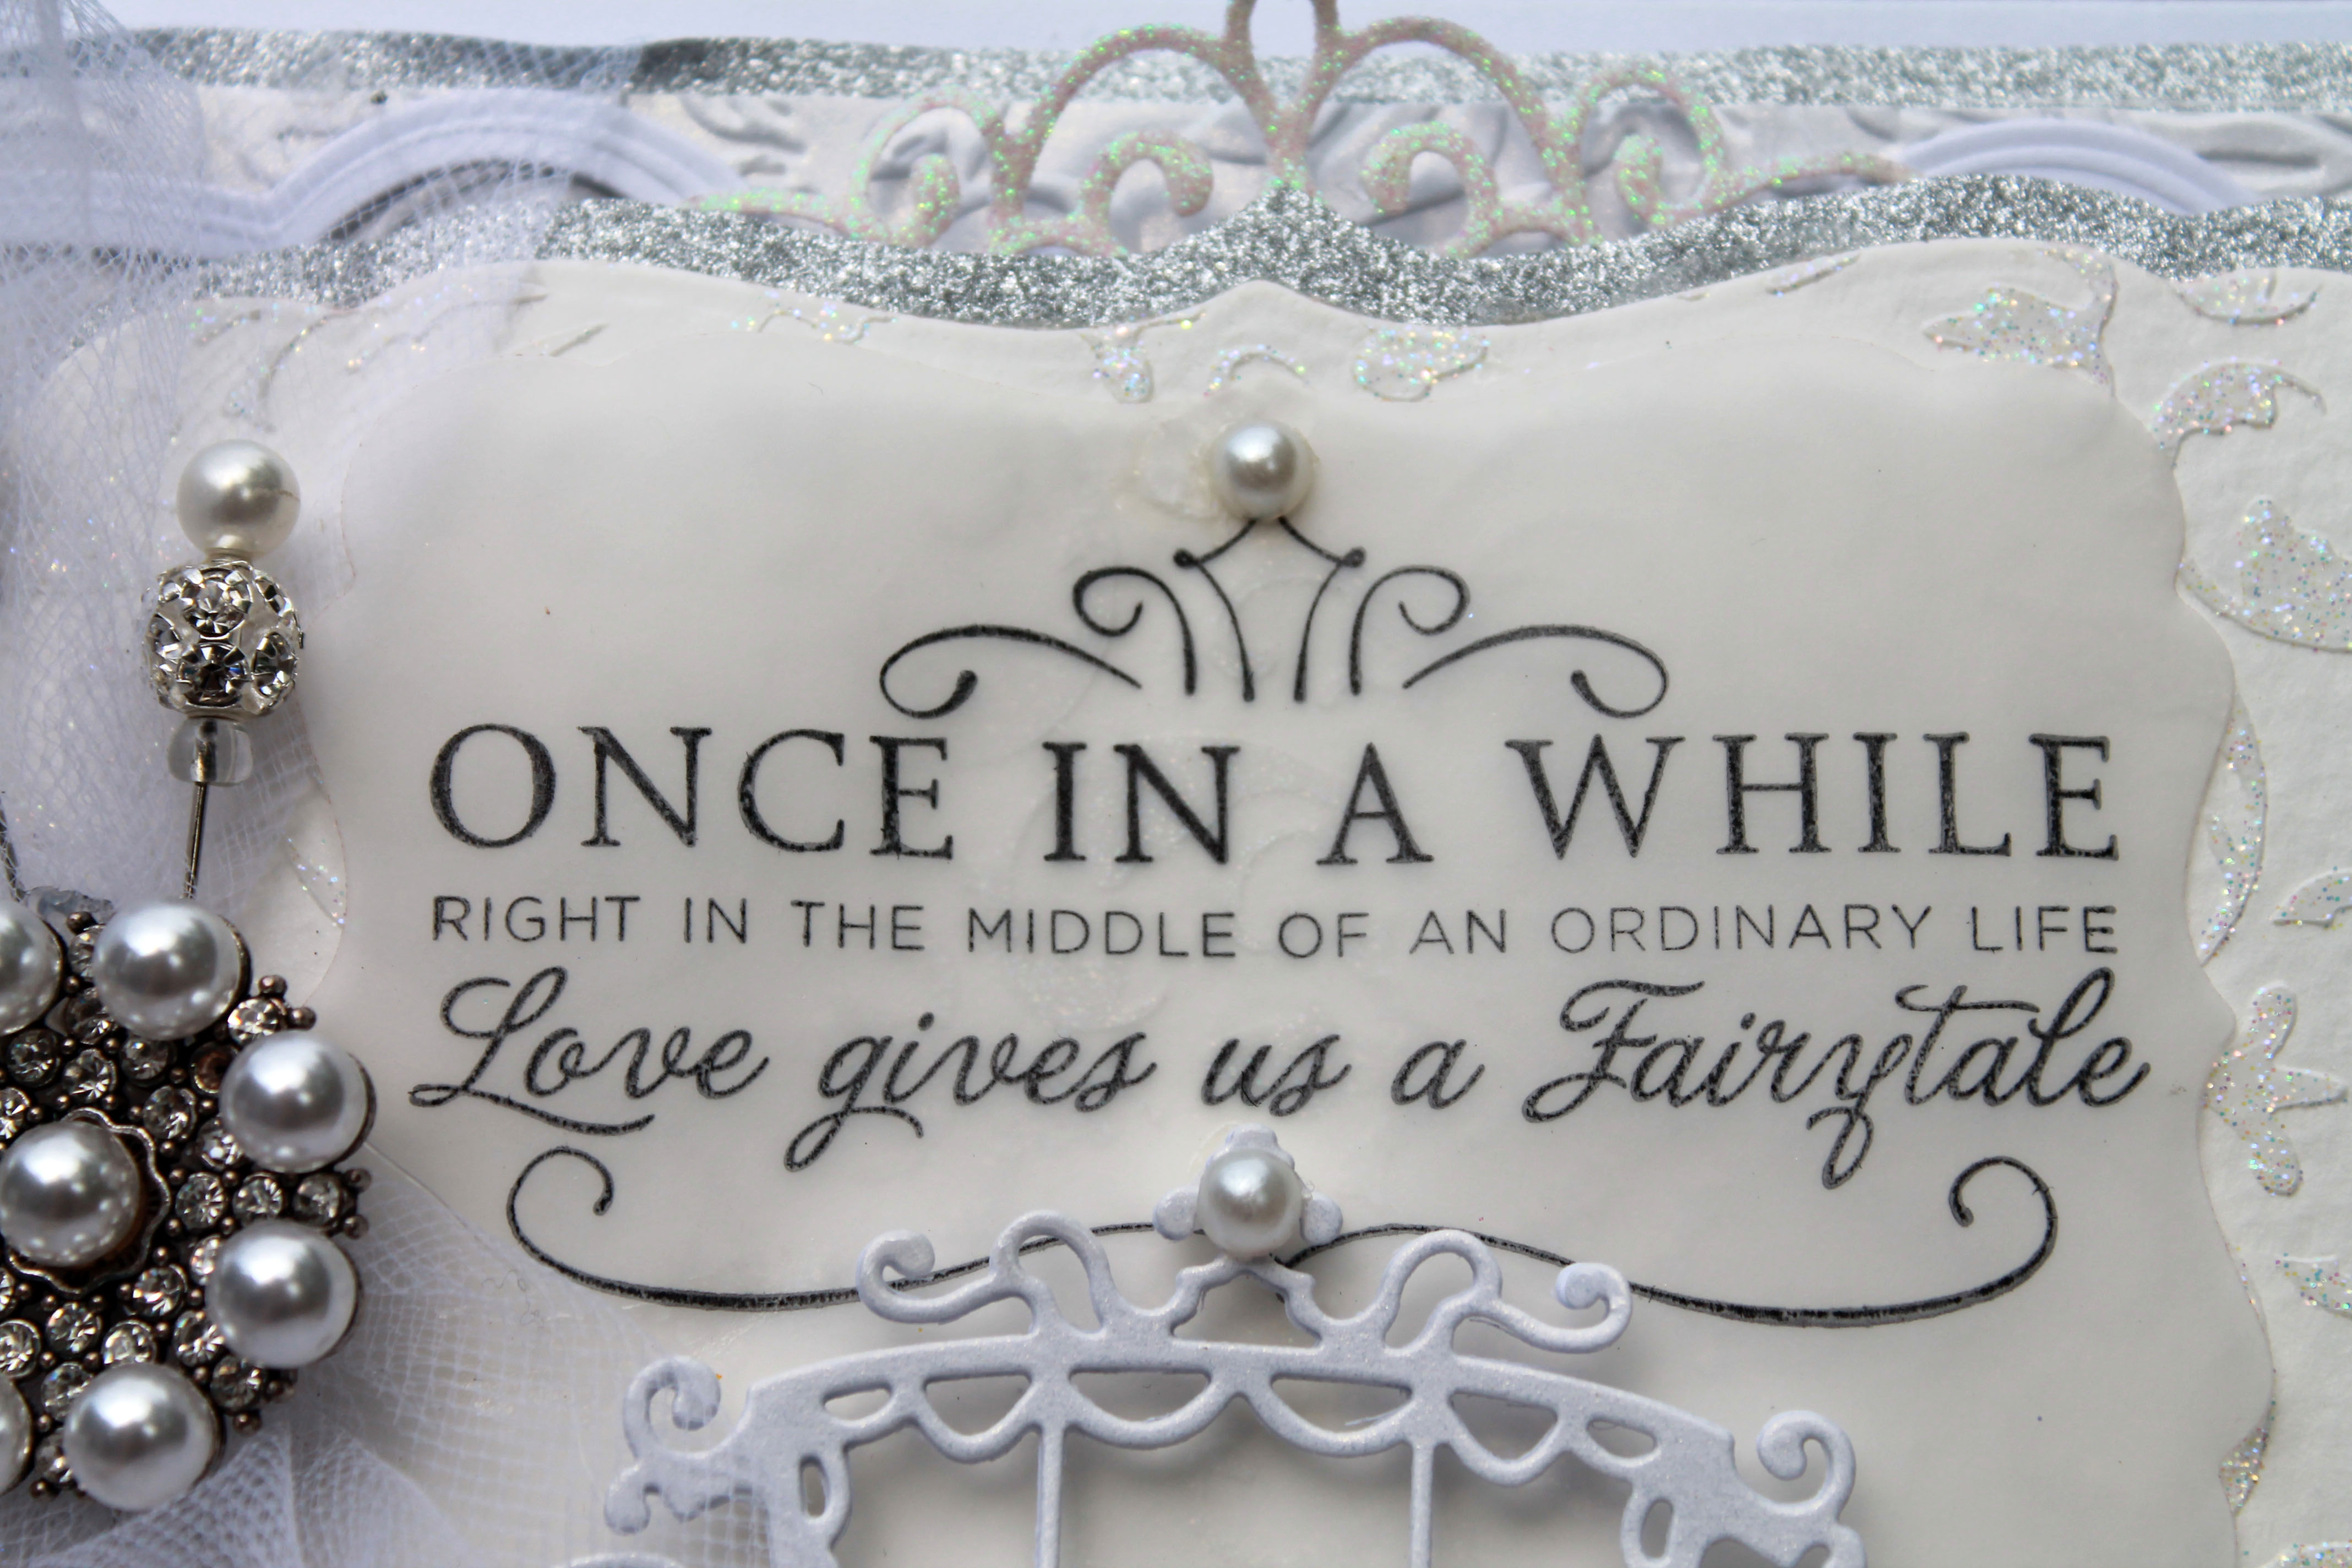
Do you have many weddings to attend this summer? Here is a beautiful wedding card for you! I just love this horse and carriage die template from Tattered Lace! This card is not difficult, but it does take a bit of time because of all the layers. Enjoy!

Happy Crafting!

Eileen

once in awhile full front view

Supplies: Once in a while stamp, staz-on Black ink, vellum, 110# white cardstock base cut for 5″ x 7″ card, 140# cold press watercolor paper, baroque stencil, modeling paste, embossing folder -swirl design, glitter, Spellbinders labels 17, Nestabilities Amazing Paper Grace Becca Feeken Ornamental Crest Etched Dies, Tattered Lace horse and carriage, Sue Wilson Dies – Scandinavian Collection – Copenhagen, rhinestone and pearl brooch, stick pins, foam tape, hot glue, dries clear adhesive, faux pearls, faux rhinestones, glitter paper, micro-fine clear or white glitter, candlelight paper, white cardstock, white tulle

Directions: We will work from the base of the card up to the top layer. Cut your card base from heavy white cardstock, cut silver glitter paper matt, cut next layer from candlelight paper and emboss with swirl design, cut Sue Wilson die from white cardstock with adhesive paper on it. after it’s die cut, peel off the adhesive cover and coat die cut with clear or white glitter. Use modeling paste on watercolor paper and sprinkle with glitter, set aside to dry. When dry, die cut piece with labels 17, use the die cut metal template to trace the shape onto the glitter paper and cut out by hand. This will give your watercolor piece a lovely size matt. Stamp sentiment on vellum, dry with heat tool and die cut with a smaller labels 17. Cut the Spellbinders ornamental crest die from white cardstock and cut in half. Layer all your pieces as shown with hot glue and foam tape to give it dimension. Be sure wrap tulle around your layers and make your bow, then adhere to your card base. Cut the horse and carriage die from candlelight paper and then cut 3 more times from heavy cardstock. Glue the layers together with the candlelight paper layer on top. Put dimensional foam tape on piece and some wet adhesive and glue into place. Stick the pins through the bow and attach brooch with hot glue. Embellish with faux pearls and rhinestones! Give to a dear friend this summer!

Happy Crafting!

Eileen


Posted on 2 Comments

2 Lovely Doves Wedding Card

Ah…. love! Pretty soon wedding season will be upon us! Get ready by having a gorgeous card available! Tulle, lace, feathers, roses, what’s not to love?!?! Here is one that I made recently as part of my application for the Heartfelt Creations Design Team! It’s an elegant, amazing easel card! Easel cards always surprise people! They aren’t hard to make, but the wow factor in giving them is priceless! This one features two Heartfelt Creations doves and a cascade of flowers from the new Flowering Dogwood Collection and my own special addition, a secret special message pocket on the back.

I wanted the look to be soft and romantic and I wanted the focal point to be the doves. Because of this, I made simple flowers and vines with no stamping details and no stamens in the flowers. I water colored them with Memento Ink and Distress Ink. The doves are stamped with jet black Staz-On ink and backed with real feathers. So without further delay: Supplies, directions and more photos are below!

dove-wedding-card-frontdove-wedding-card-side-view

5” x 7” Wedding Easel Card

Supplies: HFC Classic Rose stamps and Dies, Classic Rose Vines Die, Regal Borders and Pocket dies, Flowering Dogwood and Doves stamp and dies, Snow Kissed Tag Die, Heart die (discontinued), dries clear adhesive, hot glue, Cold Press 140# watercolor paper (I use Strathmore), 110# White cardstock, Candlelight paper, Memento Ink: Angel Pink, Distress Ink: Mowed Lawn, Vintage Photo, Picked Raspberry, Staz-On Jet Black ink, a variety of lace, chalk white seam binding ribbon, white rose ribbon, feathers, white tulle, baroque stencil, modeling paste, super fine cool white glitter, scoreboard, paper trimmer, die cutting machine, flower shaping tool, water brush, one inch hole punch, distress tool

Directions:  Cut one 4.5″ x 6″ piece of watercolor paper and stencil baroque pattern on it with stencil, modeling paste and pallet knife. Carefully remove stencil from paper and sprinkle with super fine glitter. Set aside to dry. Assemble an easel card: Cut a 5”x 7” hinged at the top card base from heavy weight 110# white cardstock. Score top piece in half and bend forward. Cut one piece of 5” x 7” heavy weight 110# white cardstock, adhere to bottom half of folded piece- you now have your easel card base. Cut 3 pieces 5” x7” of candlelight paper. Adhere to top panel and bottom inside panel and underside of the folded panel. Cut classic rose shapes from watercolor paper to make 7 flowers (1 large, 2 medium, 4 small) Color middles with Angel Pink Memento Ink. Shape while wet and set aside to dry. Cut 3 classic rose vines from watercolor paper, color with Mowed Lawn Distress Ink and a water brush. Shape and set aside to dry. Cut one Regal Border from Candlelight Paper and glue to front panel layer. Measure and cut ribbon and lace, adhere to front panel and front of bottom panel. Distress the stenciled piece by tearing off the bottom at an angle and distressing all sides and layer on card front with adhesive. (I use an electric “distress it all” tool) Using watercolor paper, stamp and cut out two doves using Staz-On jet black ink, adhere white feathers to the backside with hot glue. Cut the heart out three times and glue them together, the top layer should be candlelight paper, the under layers can be basic white cardstock. Cut cascading dogwood flower and color with water brush and distress ink. Assemble flowers, cut apart rose vines. Make a triple bow from white tulle, adhere with hot glue. Adhere everything else as shown.

Final optional step: Make a personal message pocket on the back space. Cut a piece of candlelight paper 3 ½” x 5” and using a one inch hole punch cut a half circle from the right side of the 3.5” length. Decorate with die cut of choice, flowers, vines and lace, then adhere to the back of the card (see picture). Cut a tag from Snow Kissed Tag Die, use seam binding ribbon through the hole on the tag to help put it in and out of the pocket. Write your personal message and put the tag back in. Now give it someone special for their special day!

Happy Crafting!

Eileen

PS: candlelight paper can be found at Michael’s craft stores.