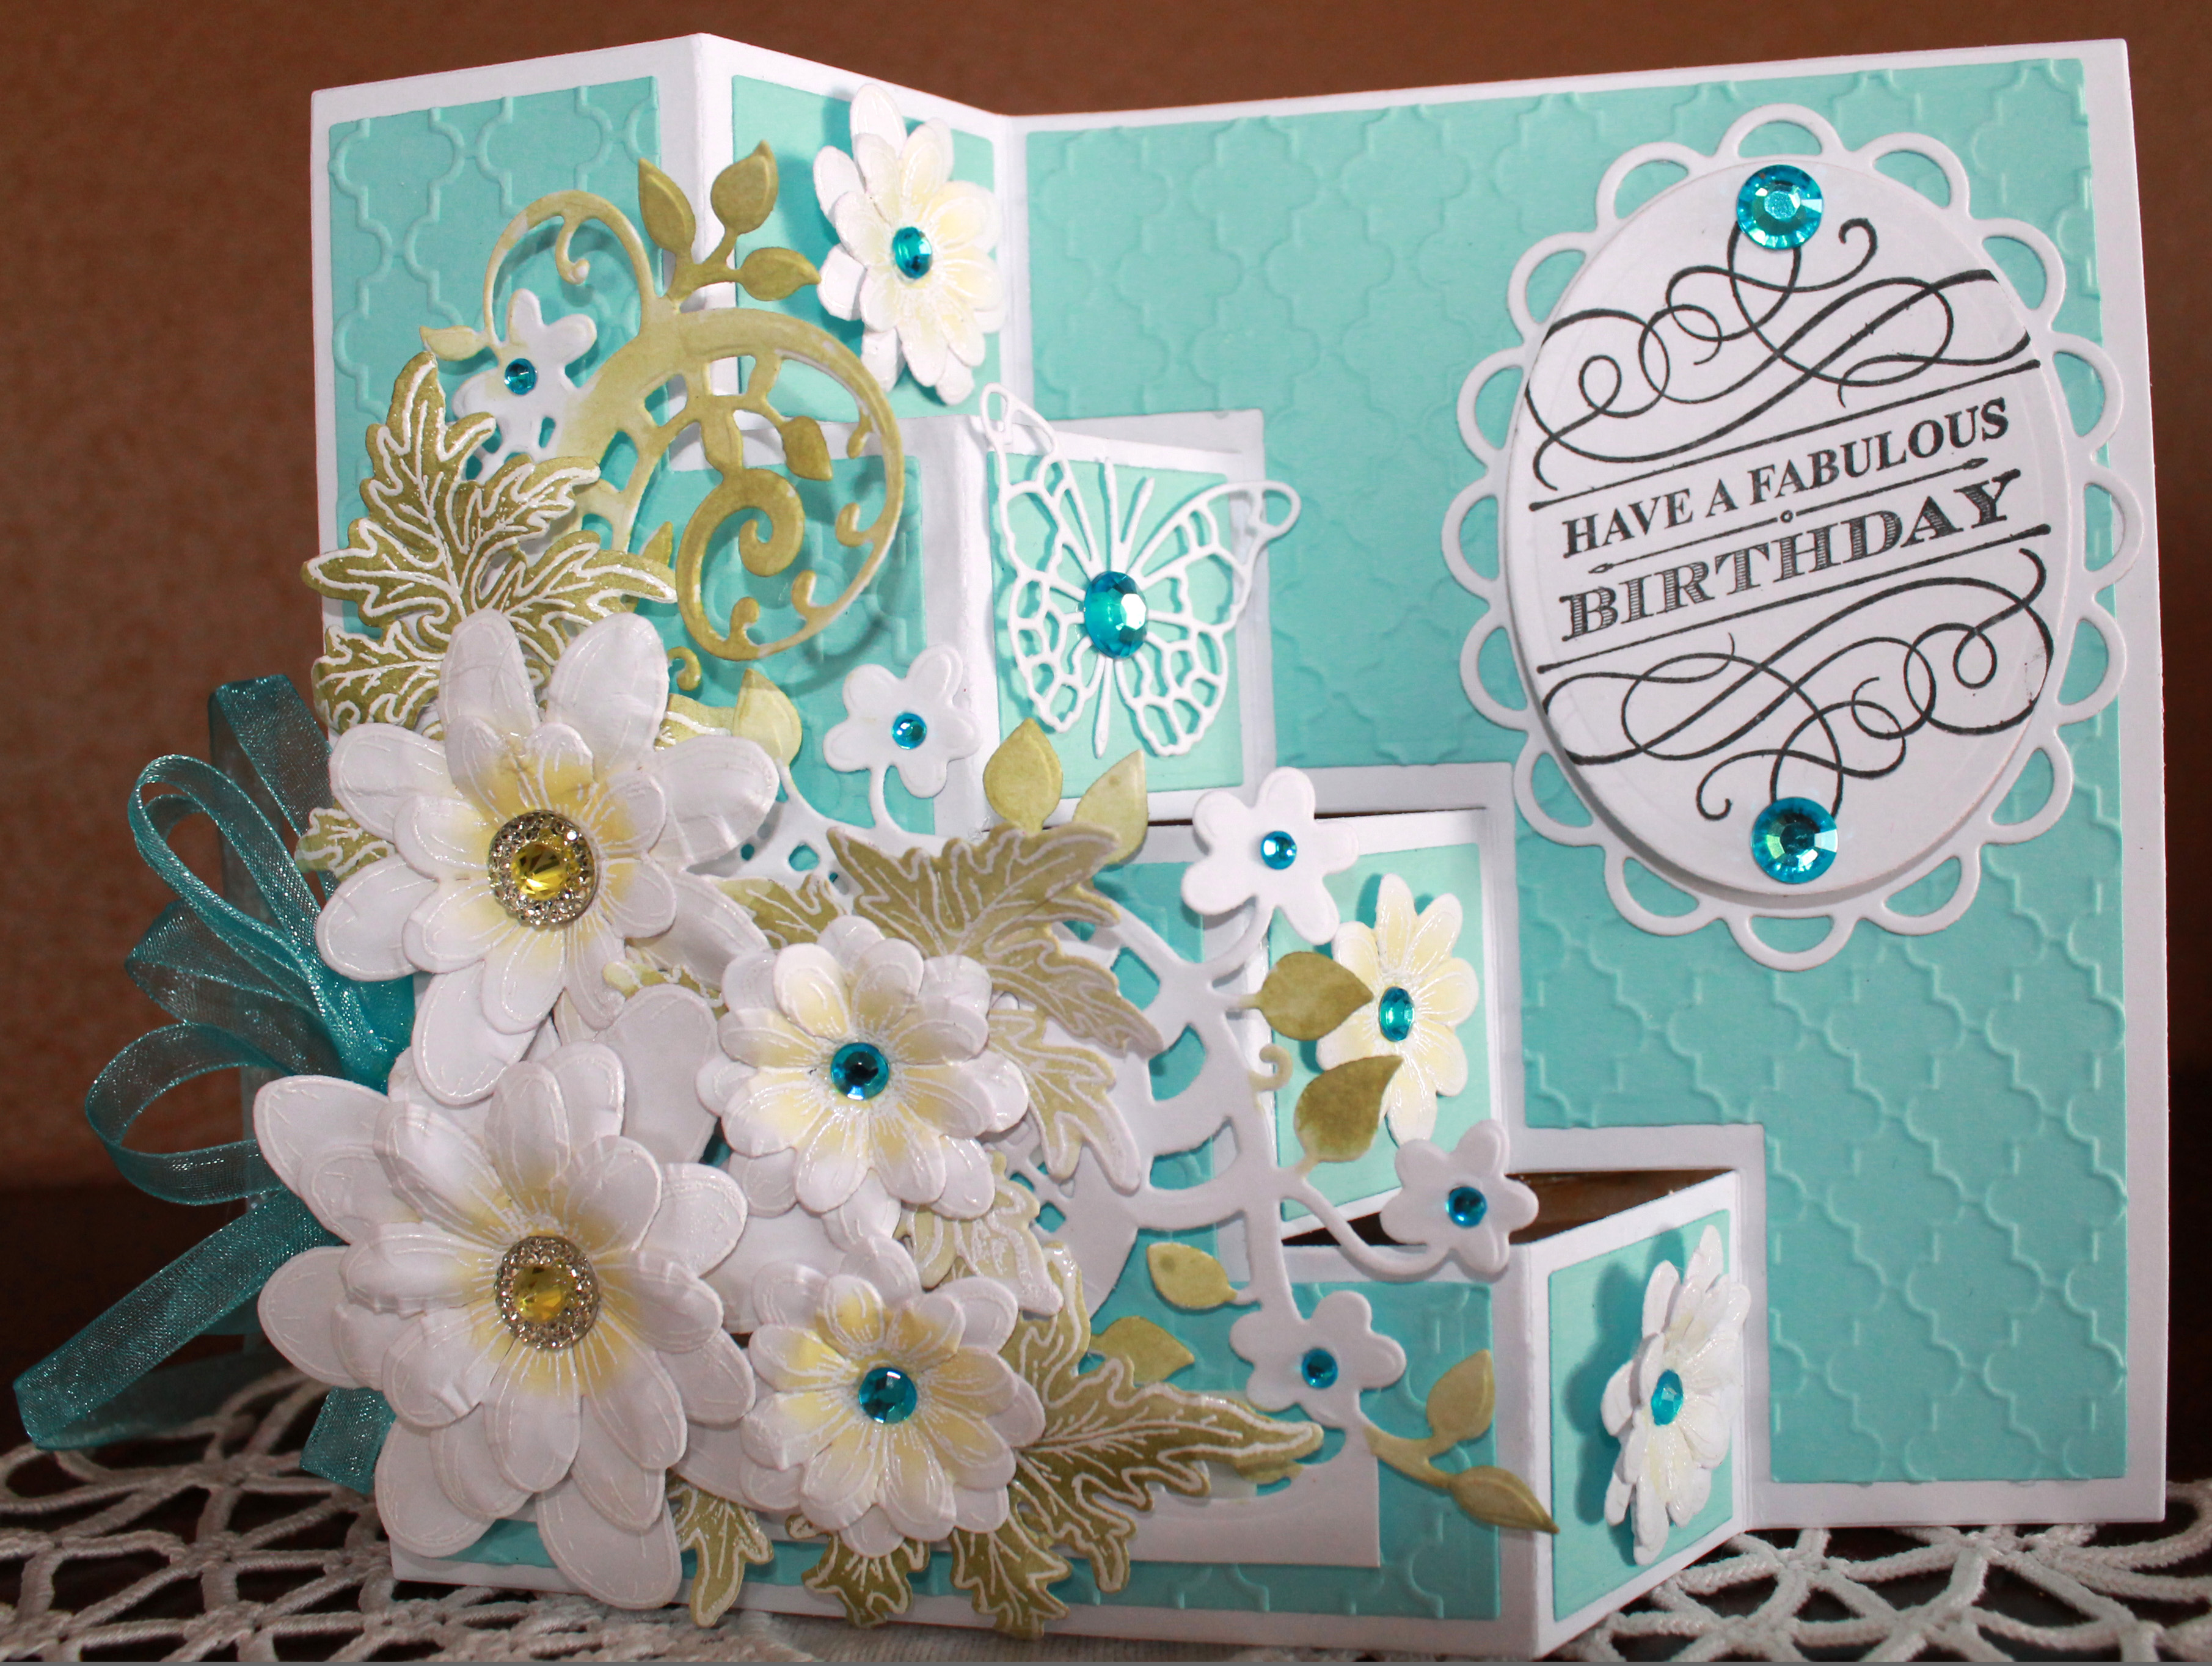
Posted on 1 Comment

Have a Fabulous Birthday!

A fresh new card to celebrate spring and a fabulous birthday! Creamy yellow & white Daises, a “blingy” butterfly, and beautiful embossing come together for this cheerful step card! It’s available in my Etsy shop, Hyde Park Hill.

step card turquoise yellow daisiesturquoise yellow fabulous birthday close up step cardturquoise yellow fabulous birthday front close up step cardturquoise yellow fabulous birthday side view step cardturquoise yellow fabulous birthday stamp close up step card - Copy

Dies: Spellbinder step die & ovals, Heartfelt Creations Daisy stamp and dies, HC corner flower scroll, memory box butterfly

Other Supplies: Distress ink- Squeezed Lemonade & Peeled Paint, Memento Tuxedo Black, White Cardstock- 110# paper, colored paper – I used turquoise from Recollections, coordinating bling, adhesive (I used dries clear glue)

Directions: Cut out a step card with white cardstock, the heavy paper, 110# helps the step card to hold it’s shape and helps it stand up better than regular cardstock which is 65#. Cut coordinating pieces with colored cardstock. Emboss the large colored cardstock. Stamp and heat emboss in white 2 sets of Heartfelt Creations daisies. Cut out daisies using coordinating die. Using a sponge dauber, highlight the middle of the daisies with yellow ink. Stamp, emboss, color and cut out three leaves. Cut out a butterfly. Shape and assemble all the flowers. Stamp the sentiment and cut out with the oval die. Layer with dimensional foam tape adhesive. Attach to the card. Arrange flowers and leaves and attach. Enjoy!

Eileen


Posted on 3 Comments

Happy Birthday Wishes

Happy Birthday Glass Wishes Birthday CardHi Everyone!

Here is a fun birthday card with a glass half round!

Supplies: Black Staz-On Ink, Spun Sugar Distress Ink, White embossing powder, white cardstock, teal cardstock, vellum, glitter paper, Die cuts by Sue Wilson Spain Collection, Scandinavian oval, Pastry Doily, banner, leaves by Cheery Lynn, Botanical Rose & butterflies stamps & dies by Heartfelt Creations, eyelet border punch by Martha Stewart, Memory Box foliage.

Directions: Die cut your card base, die cut a matching teal card base, layer doily, eyelet punch pieces, cut the glitter piece. Using foam adhesive, mount the oval, layer another teal oval on it. Stamp your rose, heat emboss with white, paint with distress inks, die cut it, shape, layer and assemble. Cut leaves from vellum and run your embossing tool down the middle for veins. For the middle of the rose, stamp “wishes” on white paper with black Staz-On, and glue onto the glass half dome with dries clear glue. Hot glue the glass piece into the center of the flower! Add your foliage, leaves, butterfly, and hot glue your flower, add some bling, and you are done! 🙂

I am entering this Cheery Lynn Doily challenge http://cheerylynndesigns.blogspot.com/2016/03/cheery-lynn-designs-challenge-224.html


Enjoy!

Eileen


Posted on Leave a comment

50th Card

50th Anniversary Yellow Rose Full Front - Copy - Copy.jpgHI Everyone,

Here is a beautiful card I created using Spellbinders roses, watercolor paper and ink and a few more items! It’s not difficult, but the result is stunning!

Supplies: Tim Holtz distress ink- honey and forest moss, 6 x 6 white card base, 5 3/4 x 5 3/4 gold card stock square for the front and two for the inside, 5 1/2 x 5 1/2 white square for the front and two for the inside, die cut frame from white cardstock and matching flourishes from gold cardstock both die cuts from Couture Creations, butterfly from Memory Box – cut one from gold cardstock, cut 12 rose leaves by Cheery Lynn from watercolor paper, cut 50 from gold cardstock.

Directions: Layer gold and white cut outs on your card base and adhere, use foam adhesive for the white frame layer to “pop it up” and give it height. Cut out a butterfly, adhere to the upper right corner. Die cut roses from water color paper and paint with ink- change up the color if you want- assemble the flowers. Arrange all your items on your card and use a strong adhesive. (I used hot glue) Double matt the inside with gold cardstock and white cardstock.

Celebrate your special occasion! This card is available in my Etsy shop. The link is on the lower right hand corner of my blog! Thanks for reading!

Eileen

50th Anniversary Yellow Rose Lg close up50th Anniversary Yellow Rose close up50th Anniversary Yellow Rose Side View


Posted on 3 Comments

Modern Baby Shower Card

Modern Yellow & Grey Baby Shower Card
Yellow Gray Baby Shower Front
Modern Yellow & Grey Baby Shower Card

Hi Everyone! I hope you had an amazing weekend! It was busy at Hyde Park Hill!

Here is a lovely Congratulations card for a Baby Shower! It’s a clean, modern look with grey and dandelion yellow Chevron stripes! Add some rolled roses and a baby carriage with an embossed vellum top and sweetness shows up!
Supplies: Cardstock- Grey, White, Chevron, vellum, memento ink- London Fog & Dandelion, Dries Clear Adhesive, die cuts from Marianne Creatables, Spellbinders Rolled Roses, Tattered Lace Tri-fold Shutter Card die, Cheery Lynn Fish Tale Banner, La La Land Heart Banner, Cottage Cutz Baby Border, Memory Box Butterflies
Here are some close ups

Have an amazing week!

Eileen


Posted on 2 Comments

Thank you! Water lilies & butterflies

pond thank you cardGood morning!

Here’s to hoping spring is in the air, even though it’s still February! I created a unique Thank you! pond card with lily pads, pink and white water lilies, some delightful mini fancy flourishes, and bright butterflies! See the die list and supply list for extra details!

This card is available in my Etsy Shop! see the link to my shop at the right hand side of my blog!

Dies: Spellbinders Labels, Cheery Lynn Mini & Tiny Fanciful Flourishes and , Magnolia Doohickey Water lily, Memory Box butterflies

Supplies: Ken Oliver Color Burst Water Color, #140 cold press water color paper, Penny Black thank you stamp, memento ink – tuxedo black, silver stamp paint, dew drops, Recollections Navy Blue cardstock, white card stock

This card is being entered to http://cheerylynndesigns.blogspot.com/2016/02/cheery-lynn-designs-challenge-223-add.htm

Enjoy your sunny weekend! (or at least I hope it’s sunny where you are today!)

Eileen


Posted on 1 Comment

Baby Shower Card

IMG_6153[1]Here is a beautiful baby shower card I made yesterday using a variety of dies from Heartelt Creations, Marianne Creatables, Tattered Lace, Cheery Lynn, Spellbinders rolled mini rosess, Memory Box butterflies, a Martha Stewart border punch, and a Doohickey rose leaf die!

I started out by using the Tattered Lace shutter card die. If you don’t have one of these, you are missing out! It makes creating a shutter card a breeze! No more measuring, slicing, bone folder-ing (is that a word?) It’s all done for you in a fast pass through a die cut machine. I use the Spellbinder Grand Calibur!

Supplies:  12 x 12 piece of cardstock, colored paper, (I used two shades of pink) patterned paper, vellum, heart shaped bling, memento ink (two shades of pink), adhesive, ribbon, heart shaped bling,

Directions: Cut a shutter card, using the Tattered Lace Shutter Die, cut coordinating paper using the matching dies. Using the lightest pink paper, cut the Heartfelt Creations “Regal Borders” die cut a two using the top cutting edge, but not the bottom cutting edge, layer them behind the dark pink shape for the end panels. Cut a long strip of paper and border punch using the eyelet punch, glue it on. Glue on your next layer of printed or embossed paper. I embossed mine with a Swiss dot embossing folder from Spellbinders. Put a piece of pink ribbon over the place where the two papers (border punch and embossed piece) meet. Adhere to both end panels of the card. Cut four butterflies–two vellum and two whit cardstock adhere on the pink squares and put in place. Cut one vellum French Doily from Cheery Lynn, and a baby carriage from Marianne Creatables, ink up the baby carriage before removing it from the die. Glue together and attach to the front panel. Middle section: layer various paper using the Tattered Lace dies. Cut the word “Baby” and the safety pin from Mariana Creatables. Make a tag using the “fish banner” from Cheery  Lynn. Adhere the pieces in place. Using Spellbinders mini rolled roses, make three roses and roll and glue. Cut 2 DoHickey rose leaves from white cardstock and 3 wreath leaves from white cardstock and three leaves in vellum from Cheery Lynn dies. Glue the flowers in a pleasing design on the end panel. On the back side of the card, cut a panel of coordinating plain paper to write your message. Done! Bliss! Enjoy!

The patterned paper for the middle section was made with ink and an embossing folder.  It’s called letter press technique.

I am entering this card in the Cheery Lynn Designs Card Challenge #222 Tickled Pink  http://cheerylynndesigns.blogspot.com/2016/02/cheery-lynn-designs-challenge-222.html

Please follow my blog <a href=”http://www.bloglovin.com/blog/14696351/?claim=cq2k2z74bb2″>Follow my blog with Bloglovin</a>

baby shower card close up 2baby shower card close up 1baby shower card close up 3

Posted on Leave a comment

On to New Adventures

Welcome to Hyde Park Hill! Today is the start of expanding an adventure I propelled myself on when I opened my paper crafting Hyde Park Hill Etsy shop one and half years ago! Here at Hydeparkhill.com I will share my new paper crafting designs and occasionally seasonal elements. As I develop tutorials for creating fun projects, I will post those too. So here’s a shout out to creativity and adventure in the new year!